Introduction
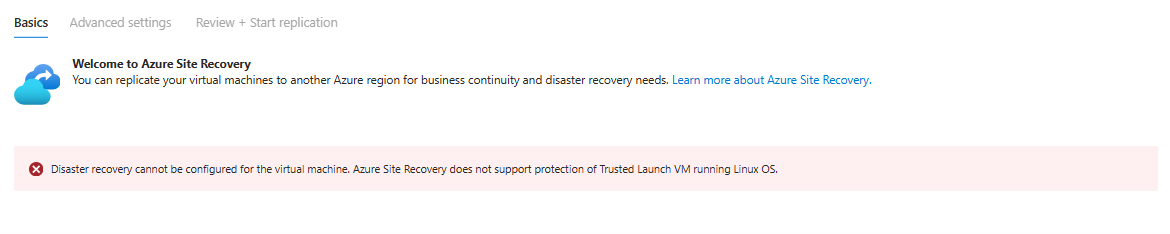
Converting an Azure Virtual Machine (VM) from a Trusted Launch configuration to Standard might seem straightforward at first glance, but the process can become considerably more complex depending on the workload running on the VM and its OS configuration. At the time of writing this, the primary use case is lack of support for Linux VM’s to be protected with Azure Site Recovery. According to Microsoft, the prescribed method involves completely redeploying the VM with a Standard security type and then redeploying your application and configuration. While this process is documented, it means you lose your existing OS and data configurations, a drawback that can lead to extended downtime and additional overhead.
This challenge is particularly acute for Linux VMs running on Trusted Launch. Since this configuration doesn’t support Azure Site Recovery, Azure native disaster recovery methods can’t be applied, making the standard redeployment process even more disruptive for administrators who need to maintain continuity.
In this post, we explore an alternative conversion method that circumvents the need for a full redeployment—allowing you to preserve your VM’s OS and data settings. We’ll walk you through a detailed, step-by-step guide to streamline the conversion process, saving both you time and effort while minimizing the risk of data loss.
Prerequisites and Assumptions
- Az PowerShell Modules
- Baseline Azure knowledge with:
- VMs
- Disks
- NICs
- Storage Accounts
- Contributor on the subscription/resource group where the VM located
Converting an Azure Virtual Machine (VM) from Trusted Launch to Standard Step-By-Step
Now that we’ve outlined the challenges of converting an Azure Virtual Machine (VM) Trusted Launch to Standard, let’s dive into the step-by-step process for an alternative conversion method. This approach allows you to retain your VM’s OS, data, and configuration without the need for a full redeployment, significantly reducing downtime and administrative overhead. Whether you’re dealing with a complex workload, custom OS configurations, or have a requirement for a Linux VM to be supported for Azure Site Recovery, this method provides a more efficient path forward. Follow the steps below to ensure a smooth and seamless migration.
Note: There is a requirement for downtime, so follow your standard change process to ensure that end users will be aware of an outage.
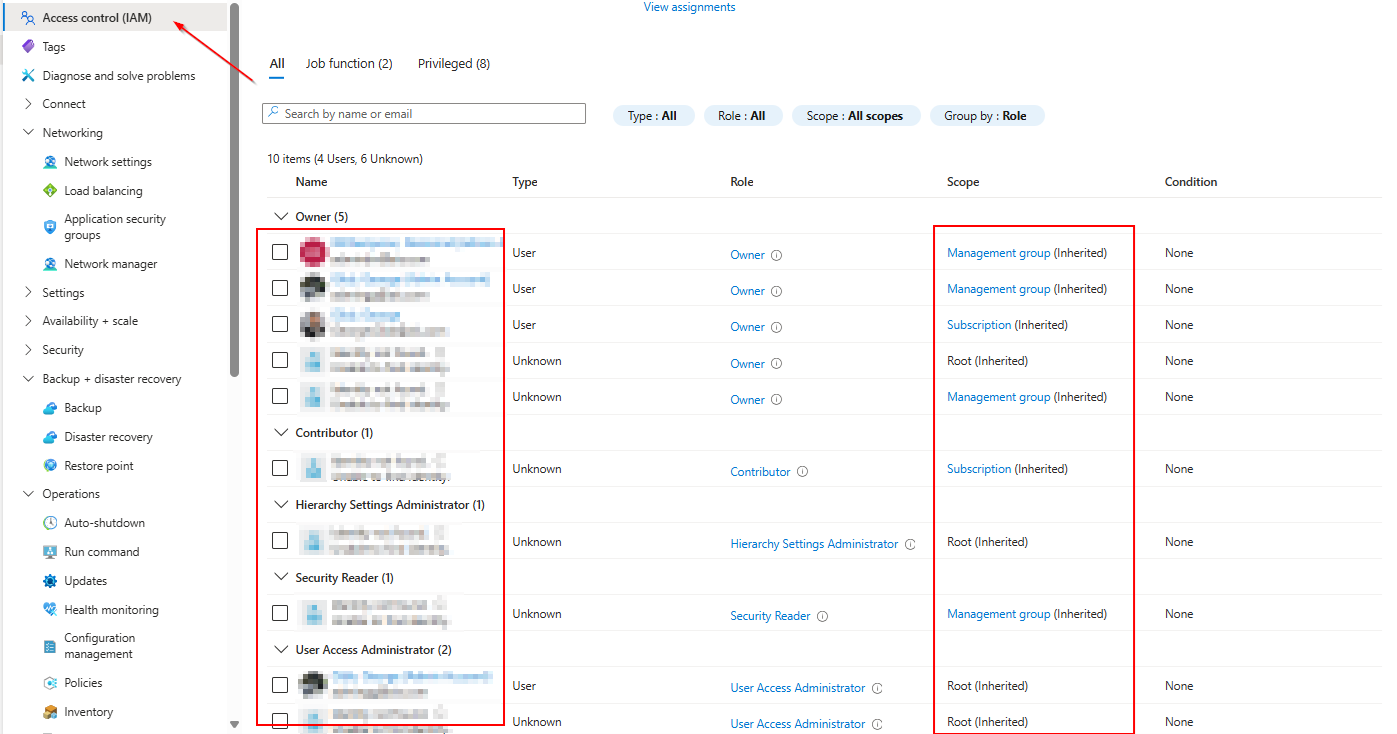
- Take an inventory of Azure RBAC Role Assignments and if you are using the VMs system managed identity take note of where you have assigned that MI permissions.
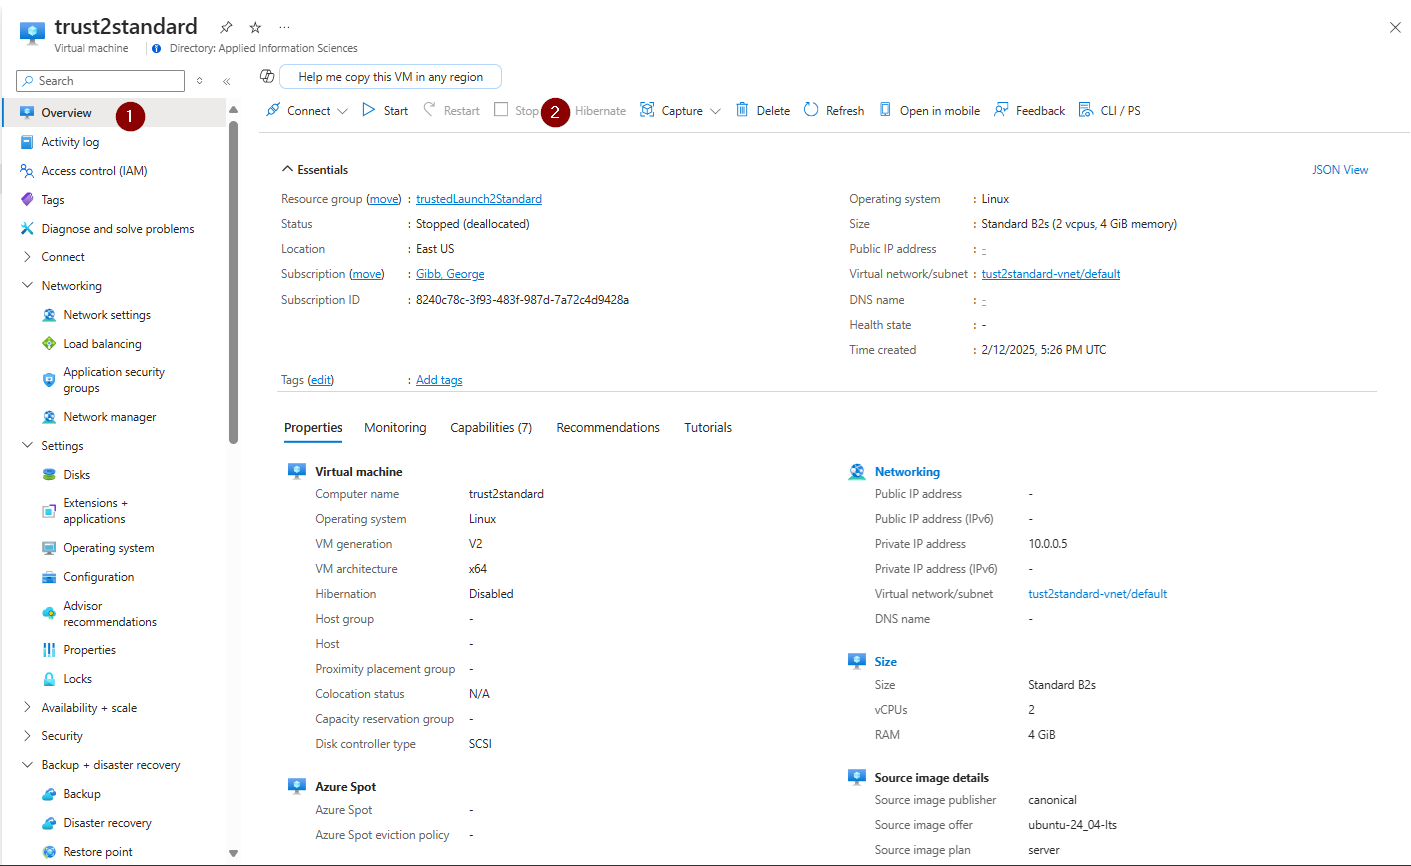
2. Shutdown the VM to ensure that no changes will be written to the disks
3. Create a backup of the VM (optional).
4. Create a temporary storage account with a blob container or use an existing one
5. Gather the following information:
- Subscription ID where the OS disk is located
- Resource group name where the OS disk is located
- Name of the disk that will be exported
- Name of the storage account where the disk will be exported
- Name of the blob container where the disk will be exported
- Storage account key
- Name of the new exported disk
6. Update the fields below with the information collected and then run the following commands in PowerShell or save it as a PS1 file to export the trusted VM’s OS disk to the blob container
#Provide the subscription Id where managed disk is located
$subscriptionId="<yourSubscriptionId>"
#Provide the name of your resource group where managed disk is located
$resourceGroupName="<yourResourceGroupName>"
#Provide the managed disk name
$diskName="<nameOfOSManagedDisk>"
#Provide Shared Access Signature (SAS) expiry duration in seconds e.g. 3600.
$sasExpiryDuration=3600
#Provide storage account name where you want to copy the underlying VHD file of the managed disk.
$storageAccountName="<targetStorageAccountName>"
#Name of the storage container where the downloaded VHD will be stored
$storageContainerName="<targetContainerName>"
#Provide the key of the storage account where you want to copy the VHD
$storageAccountKey="<storageAccountKey>"
#Provide the name of the destination VHD file to where the VHD of the managed disk will be copied.
$destinationVHDFileName="<nameOfTheNewManagedOSDisk>"
#Log into tenant
Connect-AzAccount
#Set the focus on the subscription where the disk will be copied
Select-AzSubscription -SubscriptionId $SubscriptionId
#Generate the SAS for the disk
$sas = Grant-AzDiskAccess -ResourceGroupName $resourceGroupName -DiskName $diskName  -DurationInSecond $sasExpiryDuration -Access Read
#Create the context for the storage account which will be used to copy the disk to the storage account
$destinationContext = New-AzStorageContext -StorageAccountName $storageAccountName -StorageAccountKey $storageAccountKey
#Copy the snapshot to the storage account
Start-AzStorageBlobCopy -AbsoluteUri $sas.AccessSAS -DestContainer $storageContainerName -DestContext $destinationContext -DestBlob $destinationVHDFileName
#Get status of disk copy
Get-AzStorageBlobCopyState -Blob $destinationVHDFileName -Container $storageContainerName -Context $destinationContext


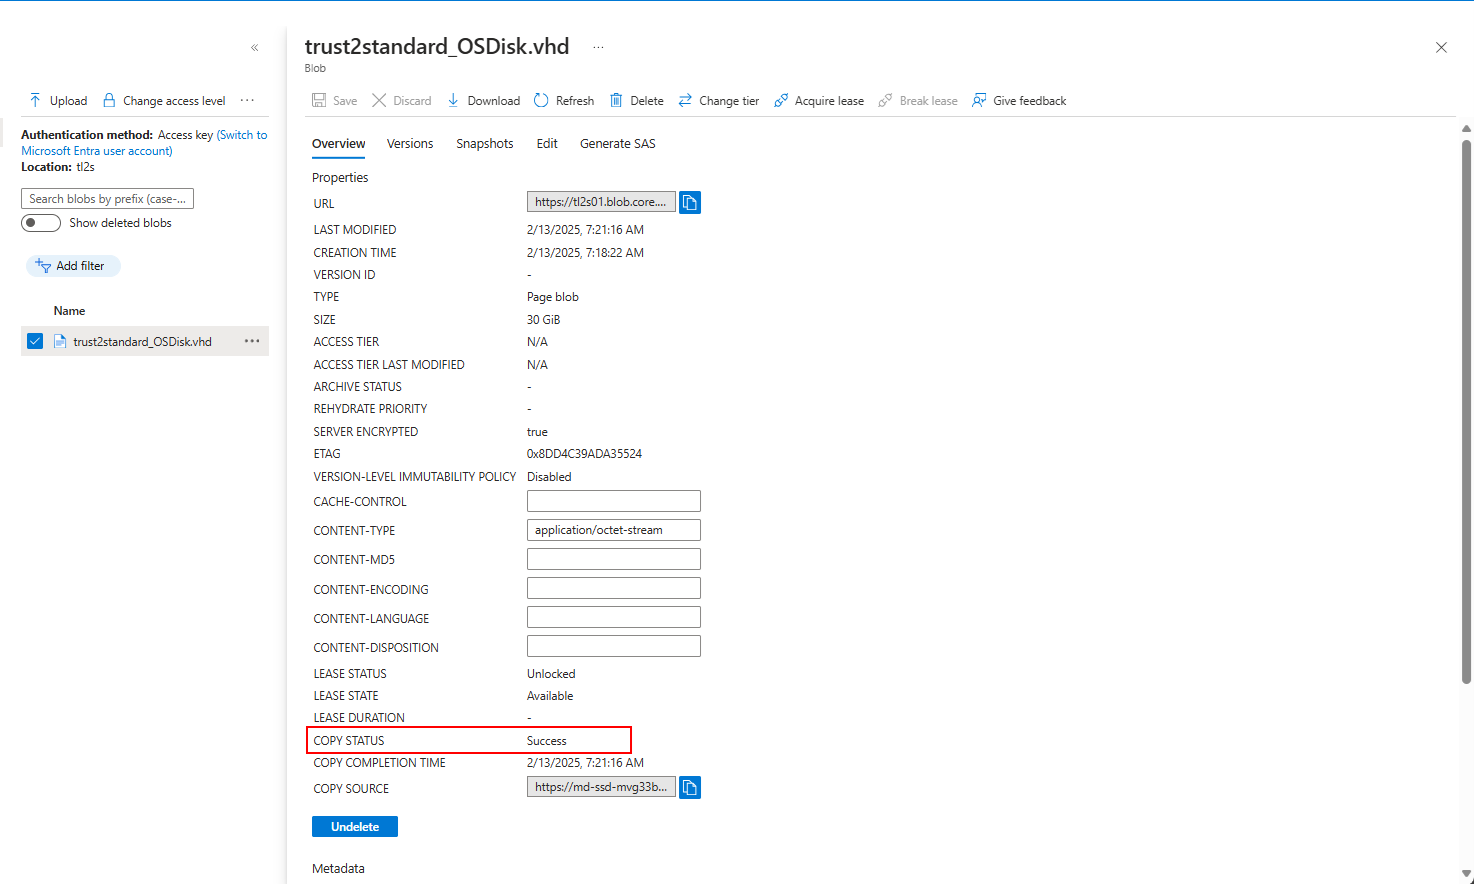
7. Create a new managed disk from the exported VHD in the blob container
a. Select the target Subscription
b. Click Create
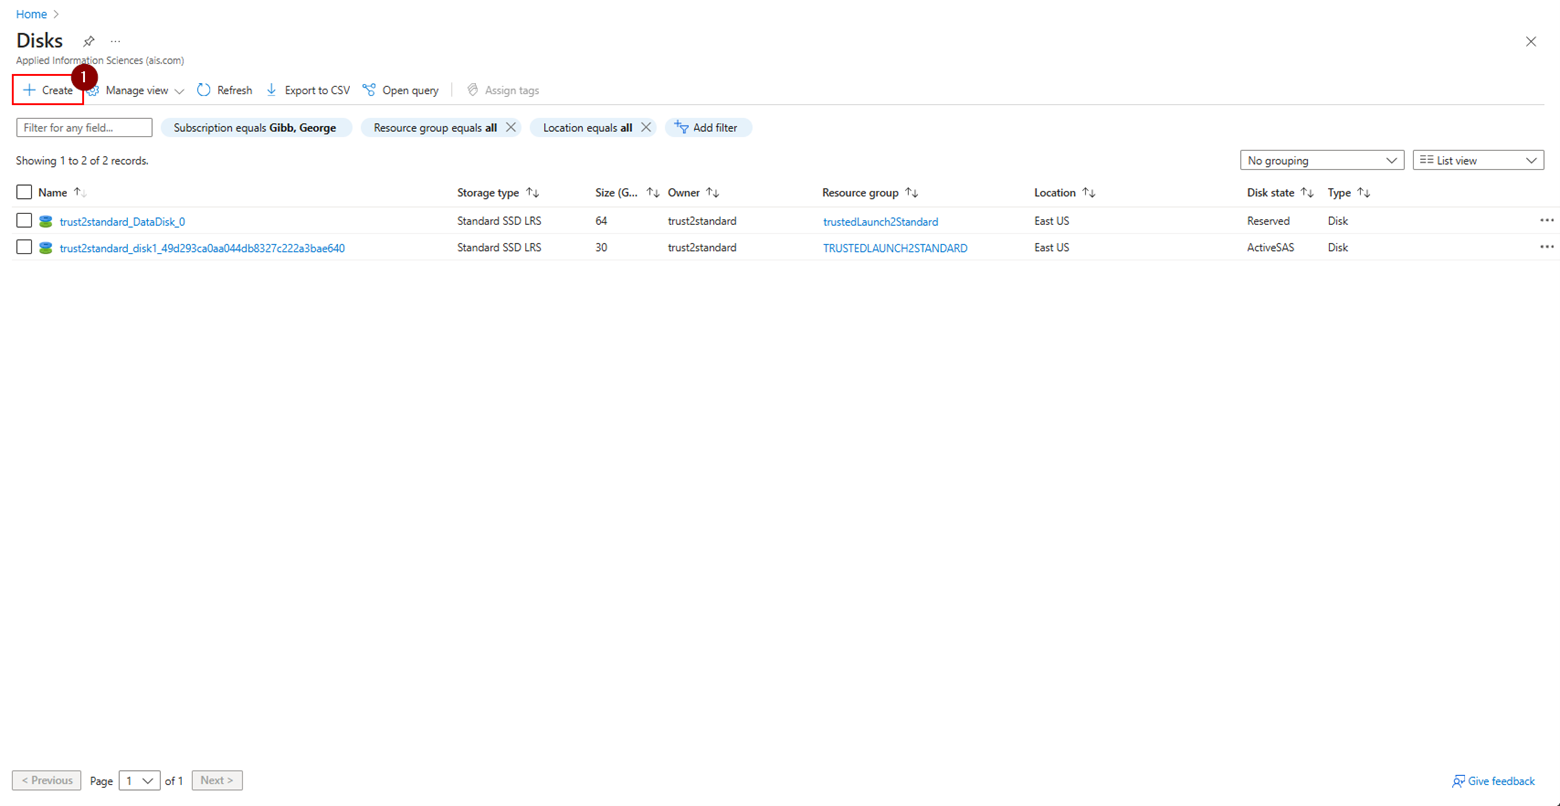
c. Select the target Subscription
d. Select the target Resource group
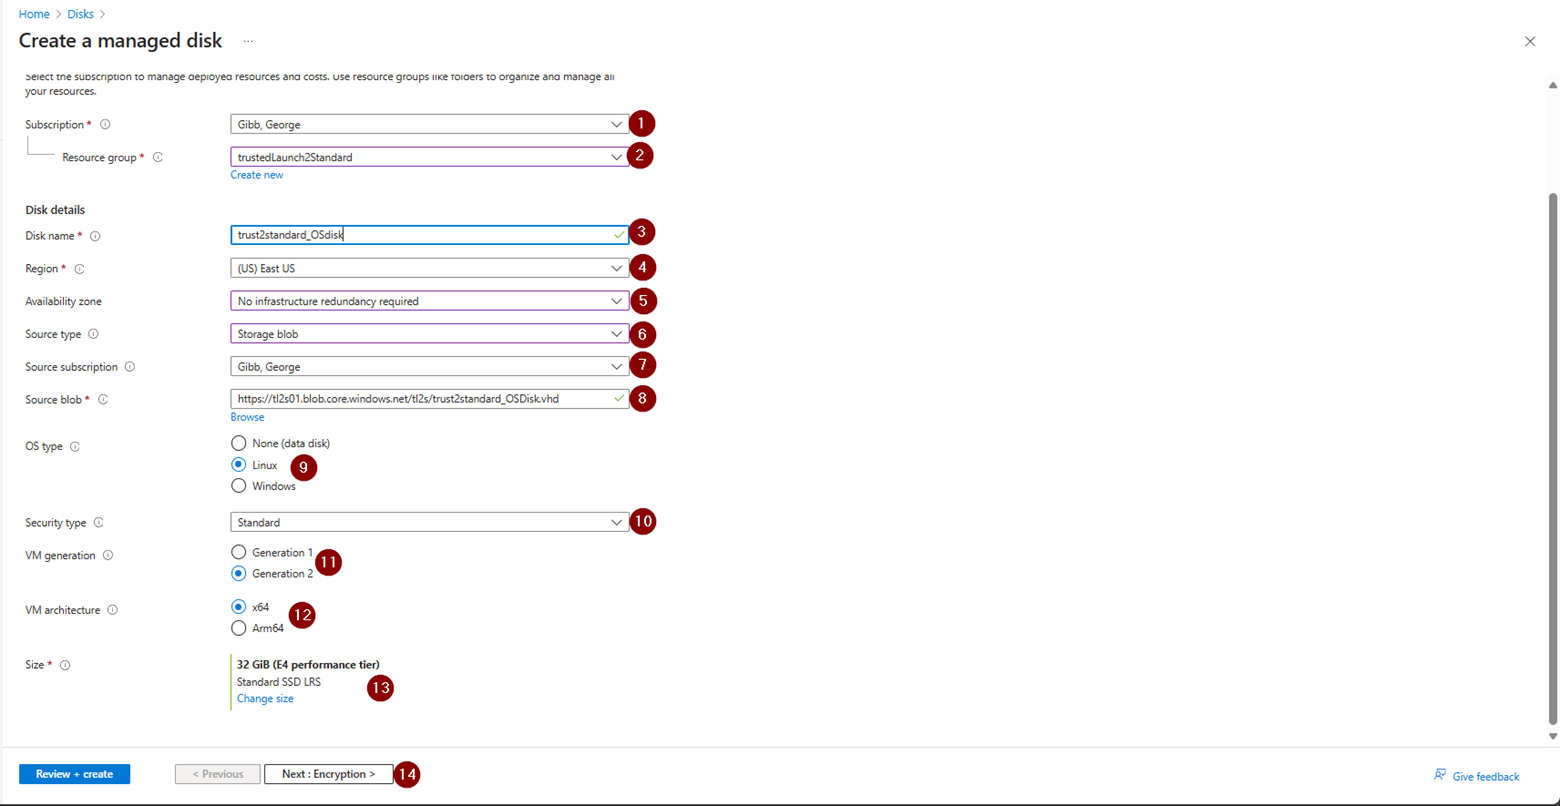
8. Create a Managed Disk
- Supply the desired Name
- Select the correct Region
- If you are using Availability Zones, select the zone
- Source type select Storage blob
- Select the Subscription where the newly exported disk is located
- For Source blob click Browse > select the storage account where the exported disk is located > the select the container > finally select the disk > click Select
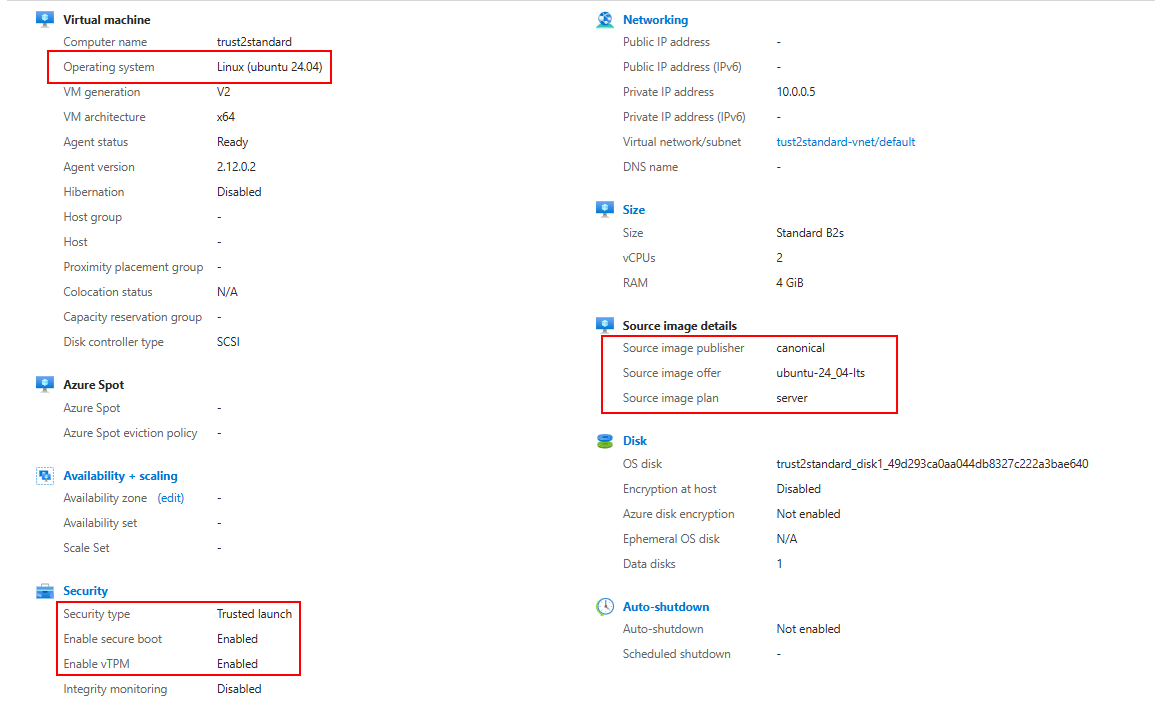
- Select the OS type (in this example I am using Linux)
- Make sure Security type is set to Standard
- Select the correct VM generation
- Select the correct VM architecture
- Select the desired size and disk type
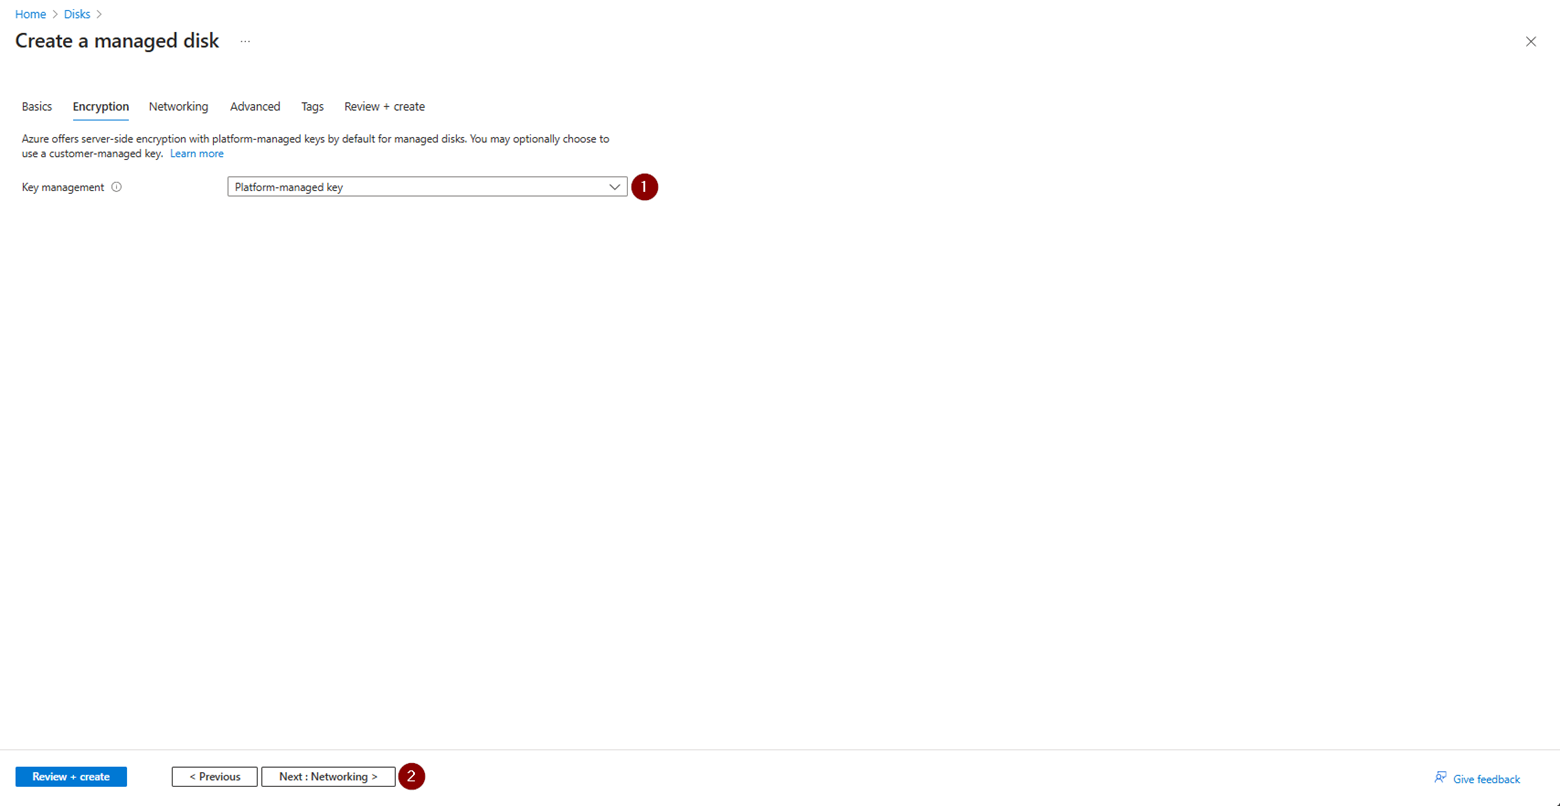
- Click Next: Encryption
m. Select the desired Key management > click Next: Networking
n. Select the desired Network access > Next: Advanced

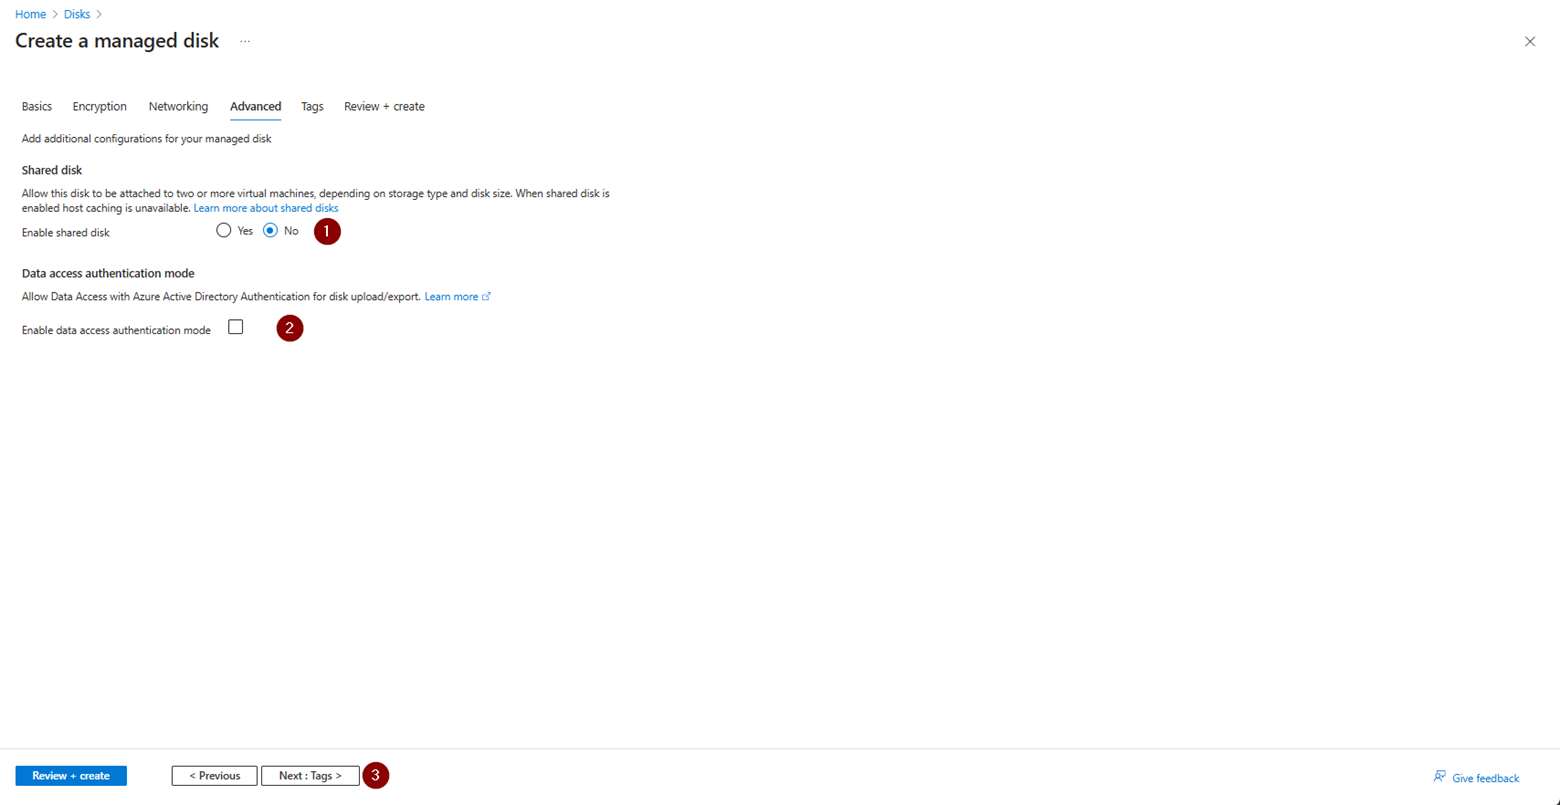
o. Select the desired Advanced Settings > click Next: Tags
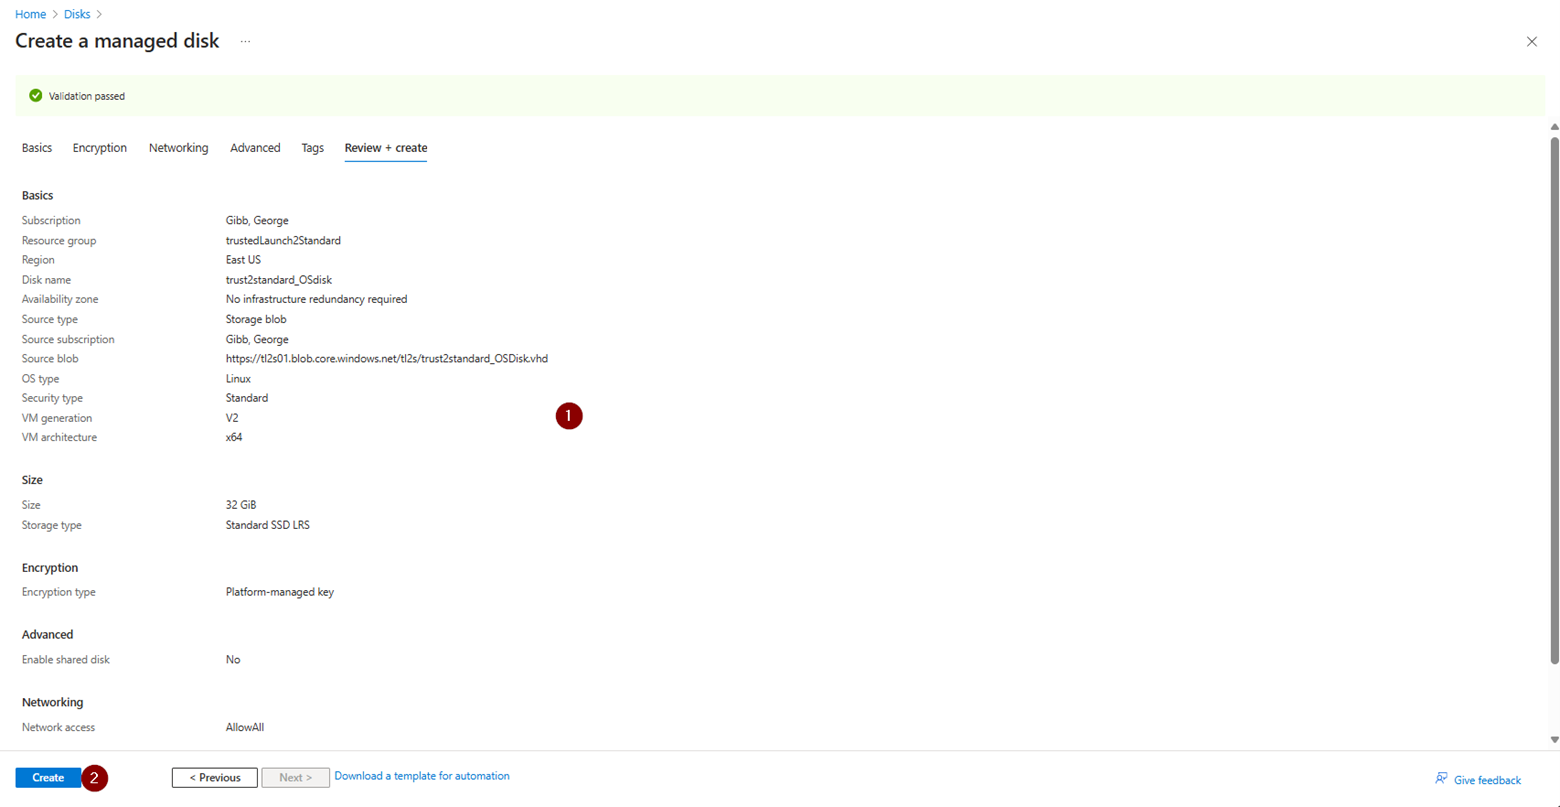
p. Enter any required tags > click Next: Review + create
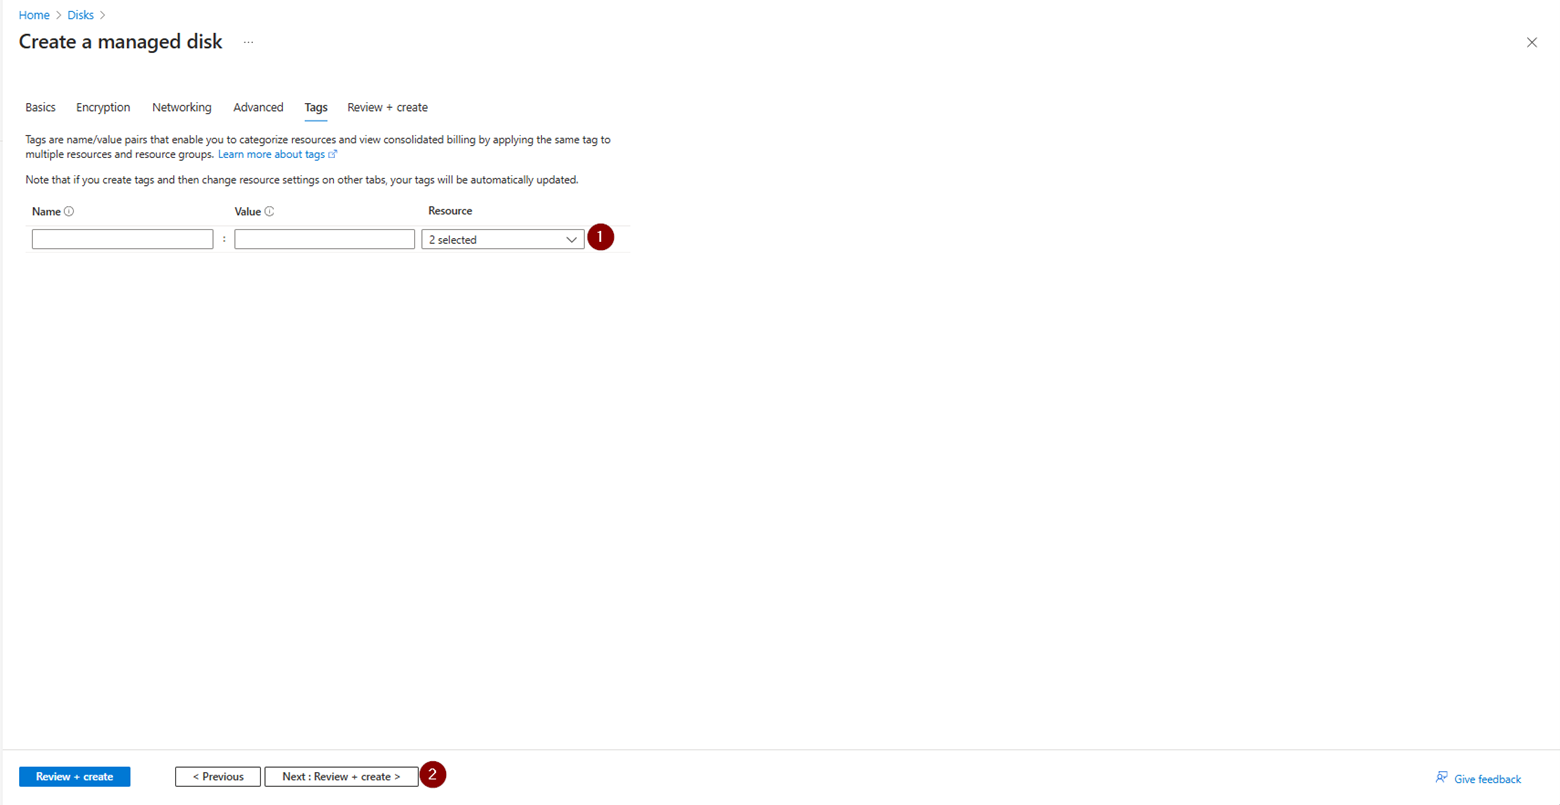
q. Review the configuration then click Create
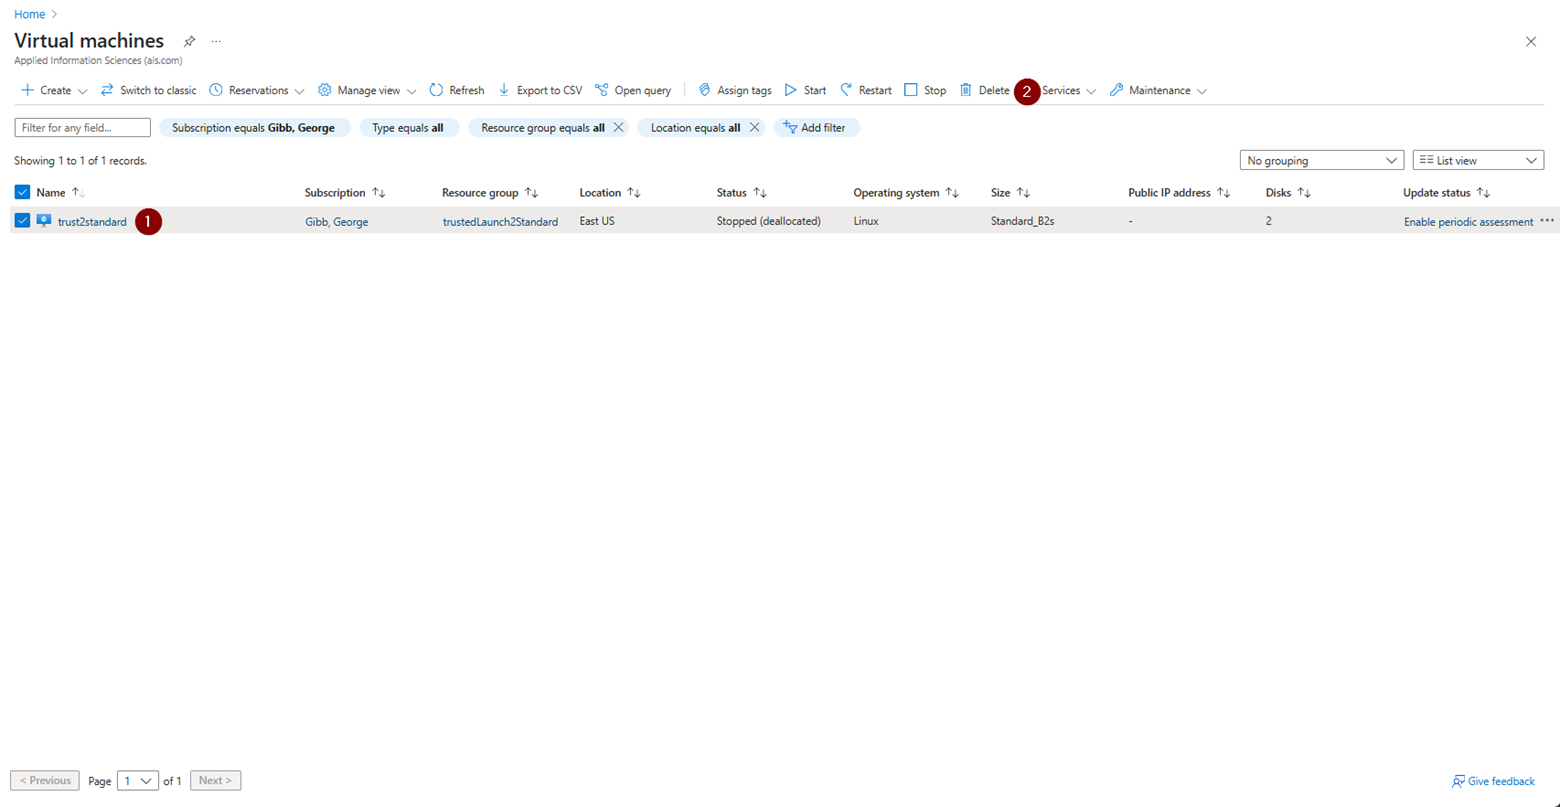
9. Delete the old VM, save the NIC and data disk(s) (make a note of the IP in case it auto deletes). You should also take note of any other VM configuration that is unique to your environment.

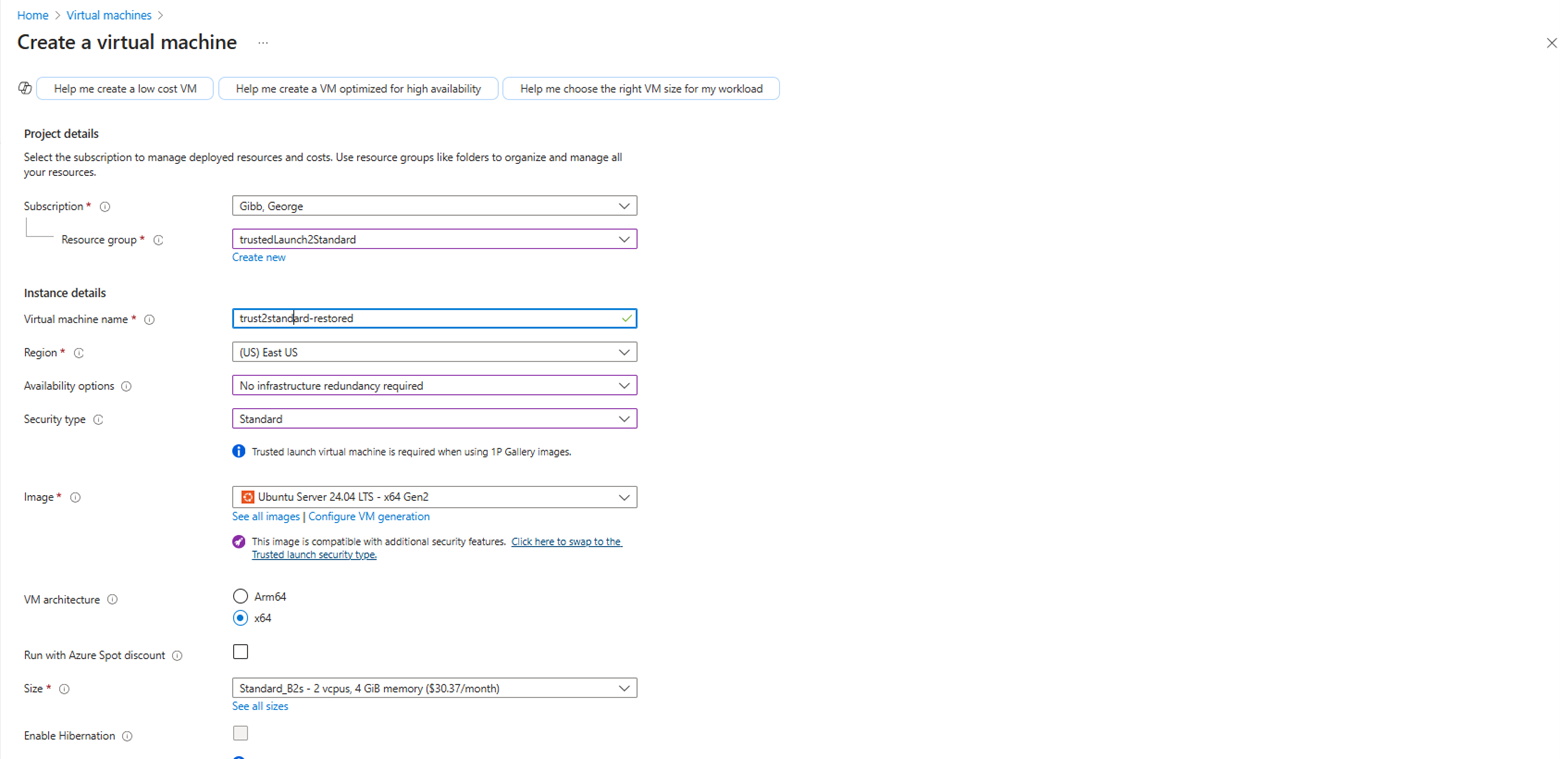
10. Create a new standard VM with the same OS version, Standard Security Type and any VM specific configurations that the source VM was configured with then shut it down.
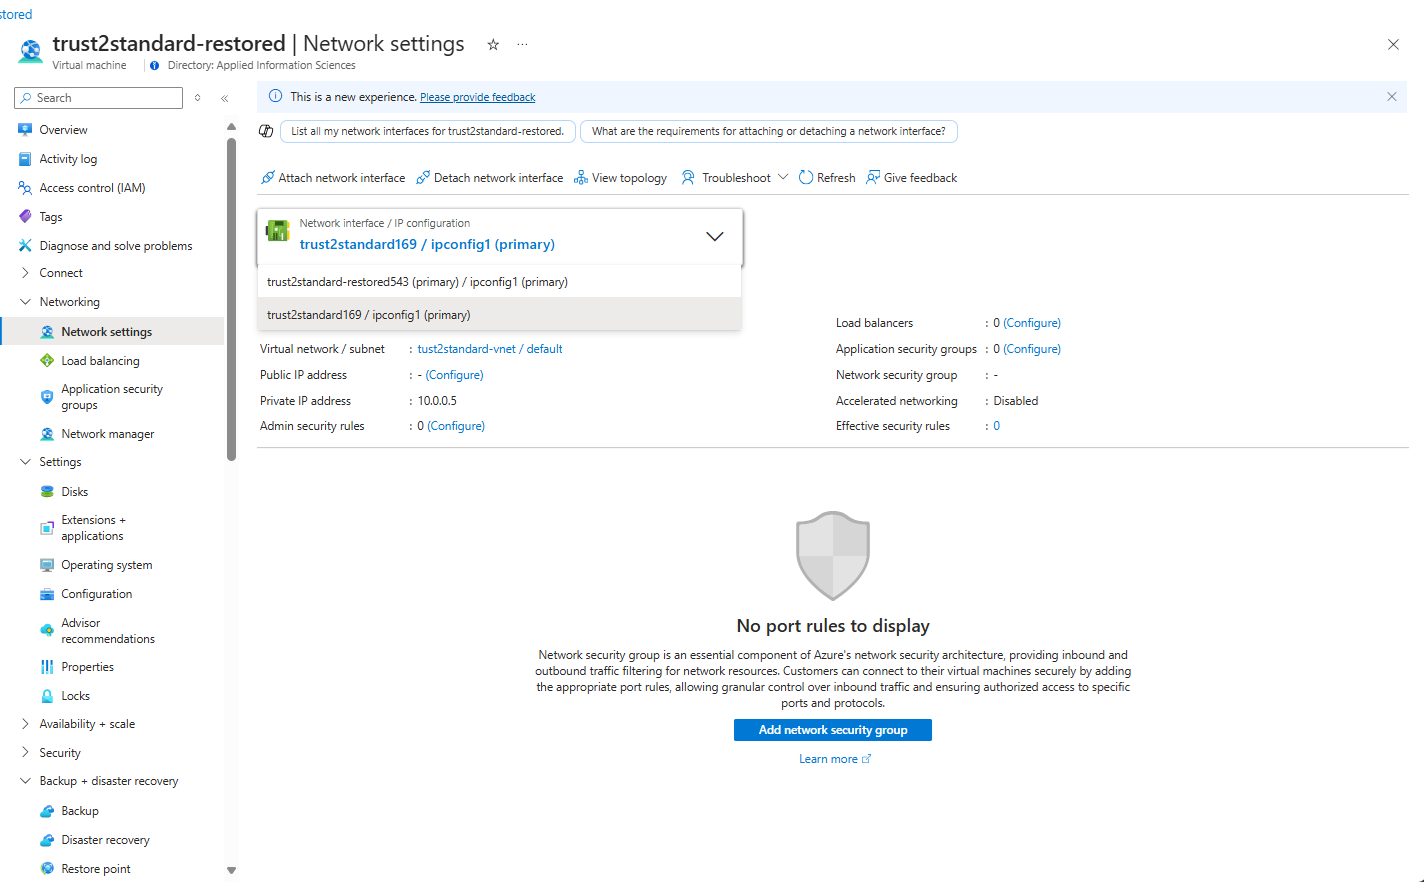
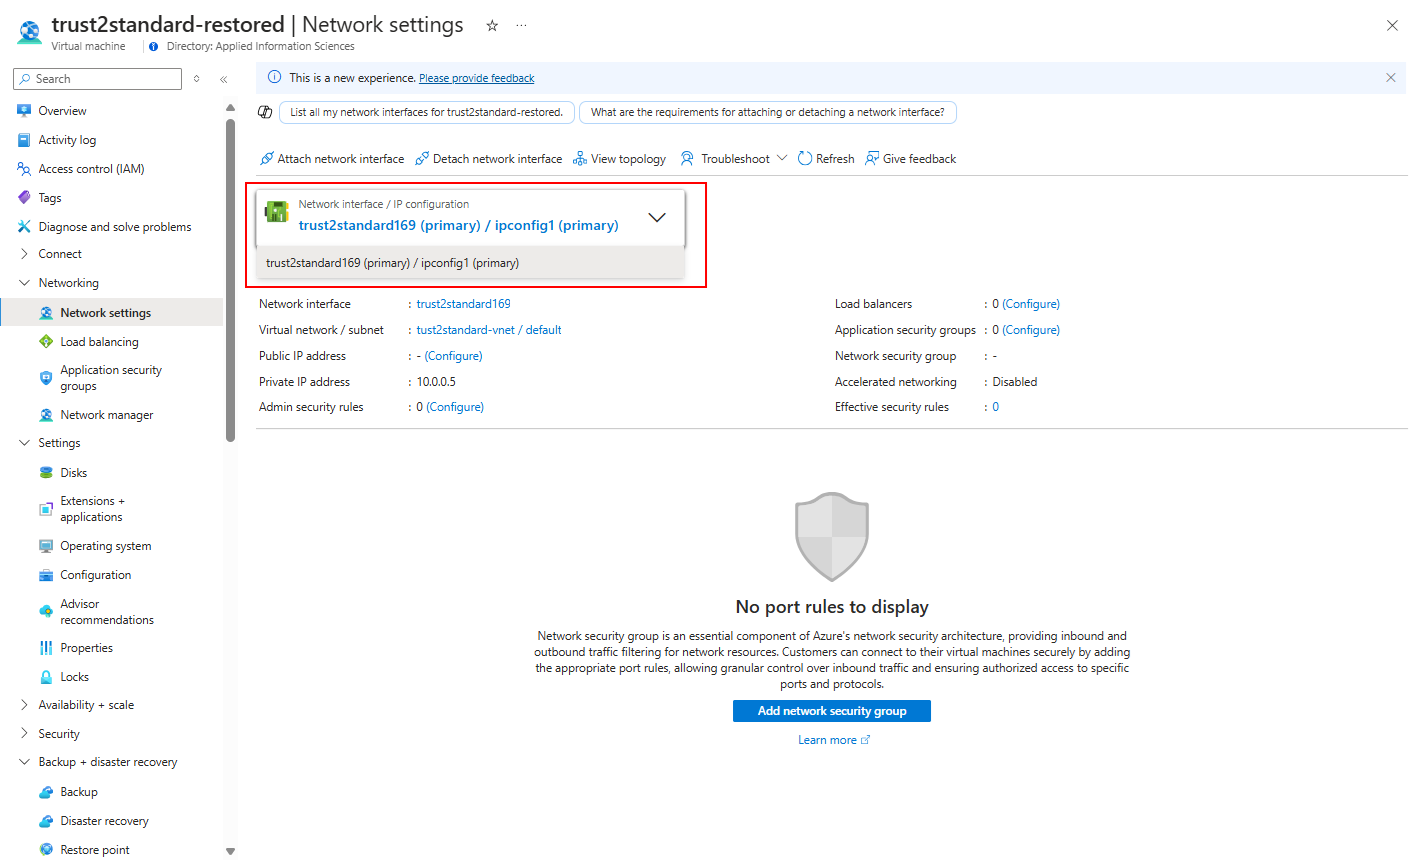
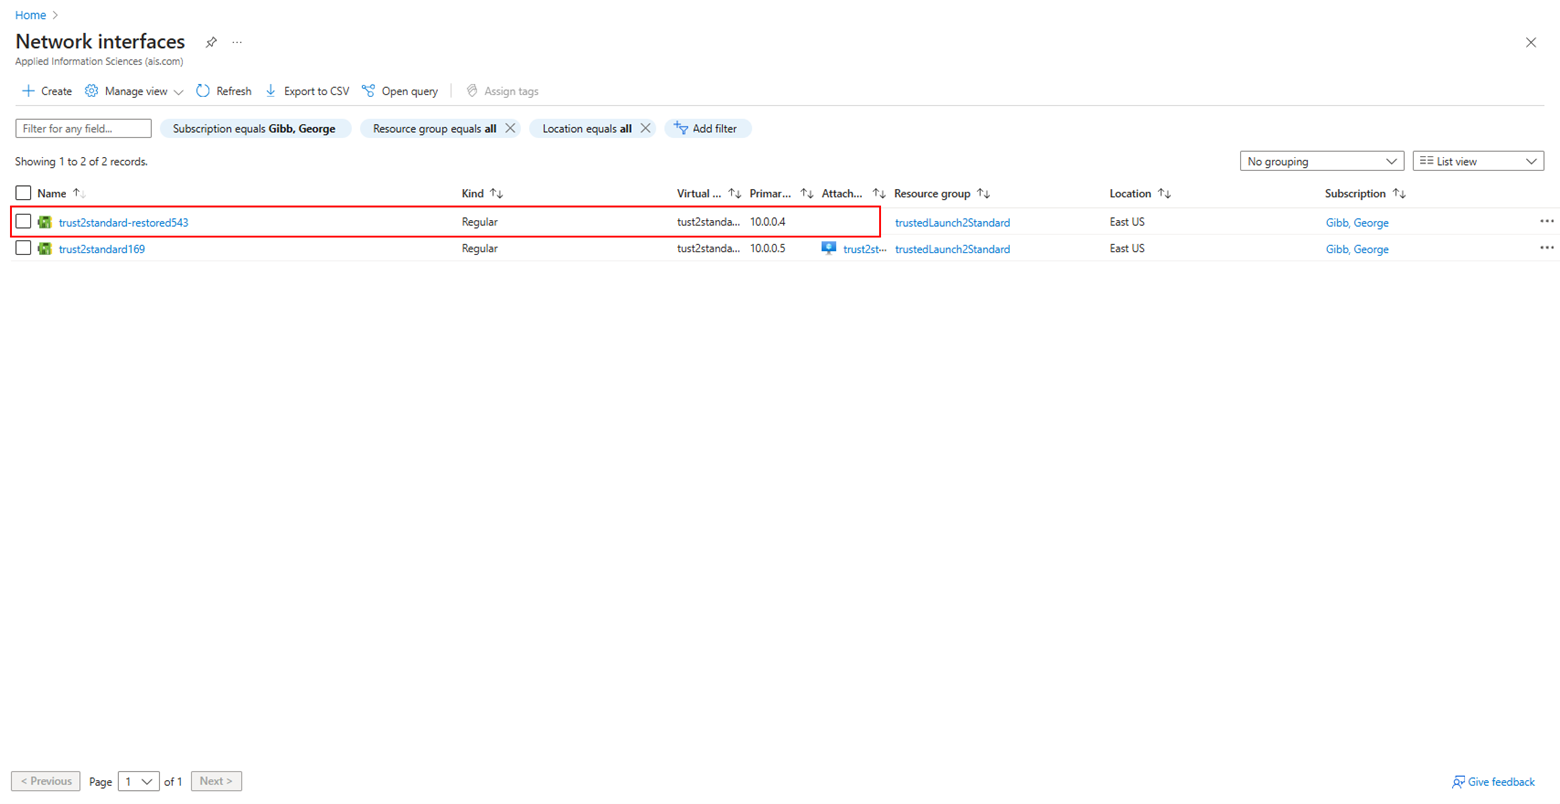
11. Swap the NIC on the newly created VM with the old NIC (if its available, if not you will need to create a new NIC or use the NIC that was created with the newly deployed VM.)
a. Note: You will have to attach the old NIC first then detach the NIC that was created with the VM
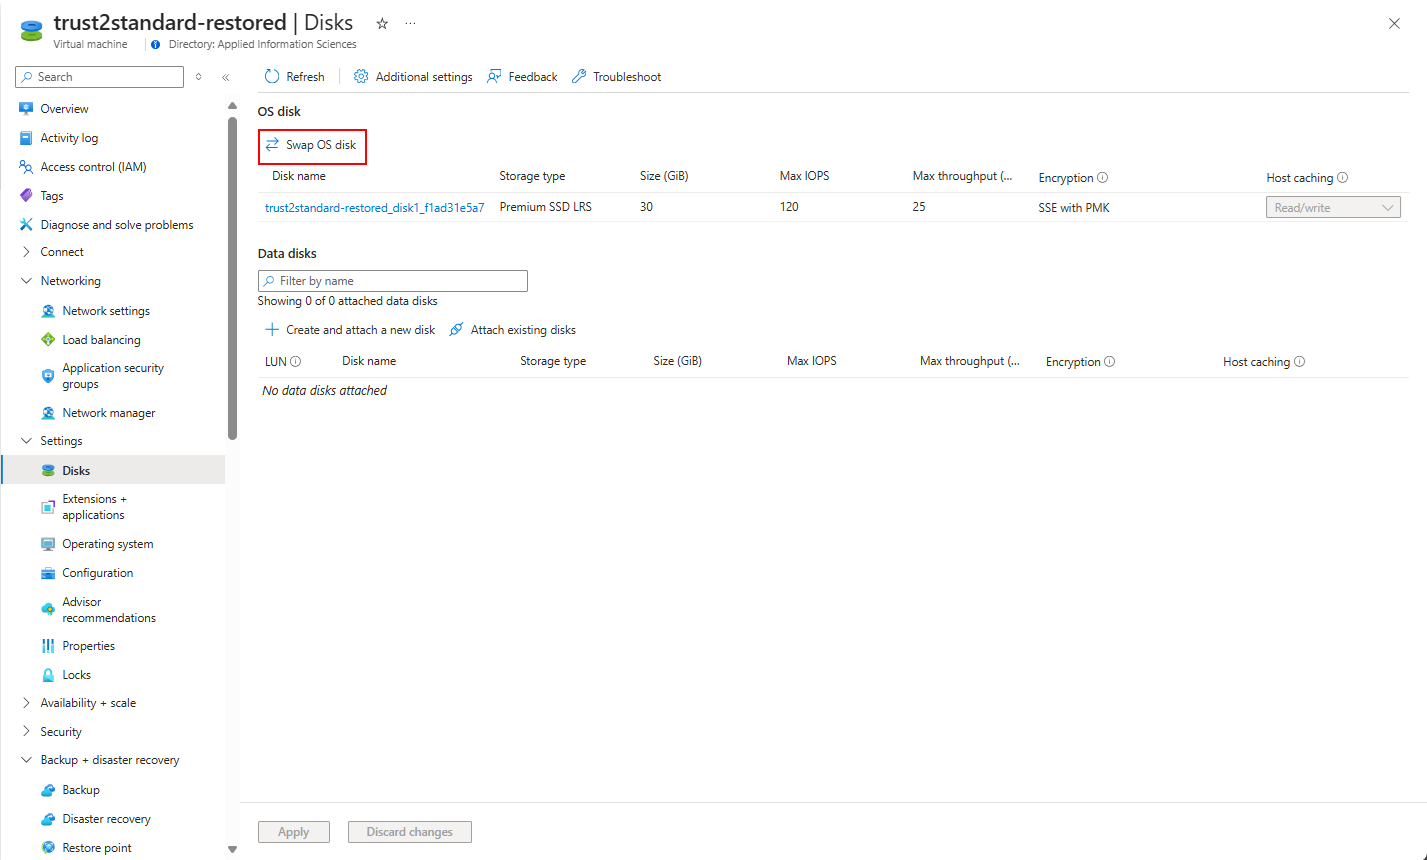
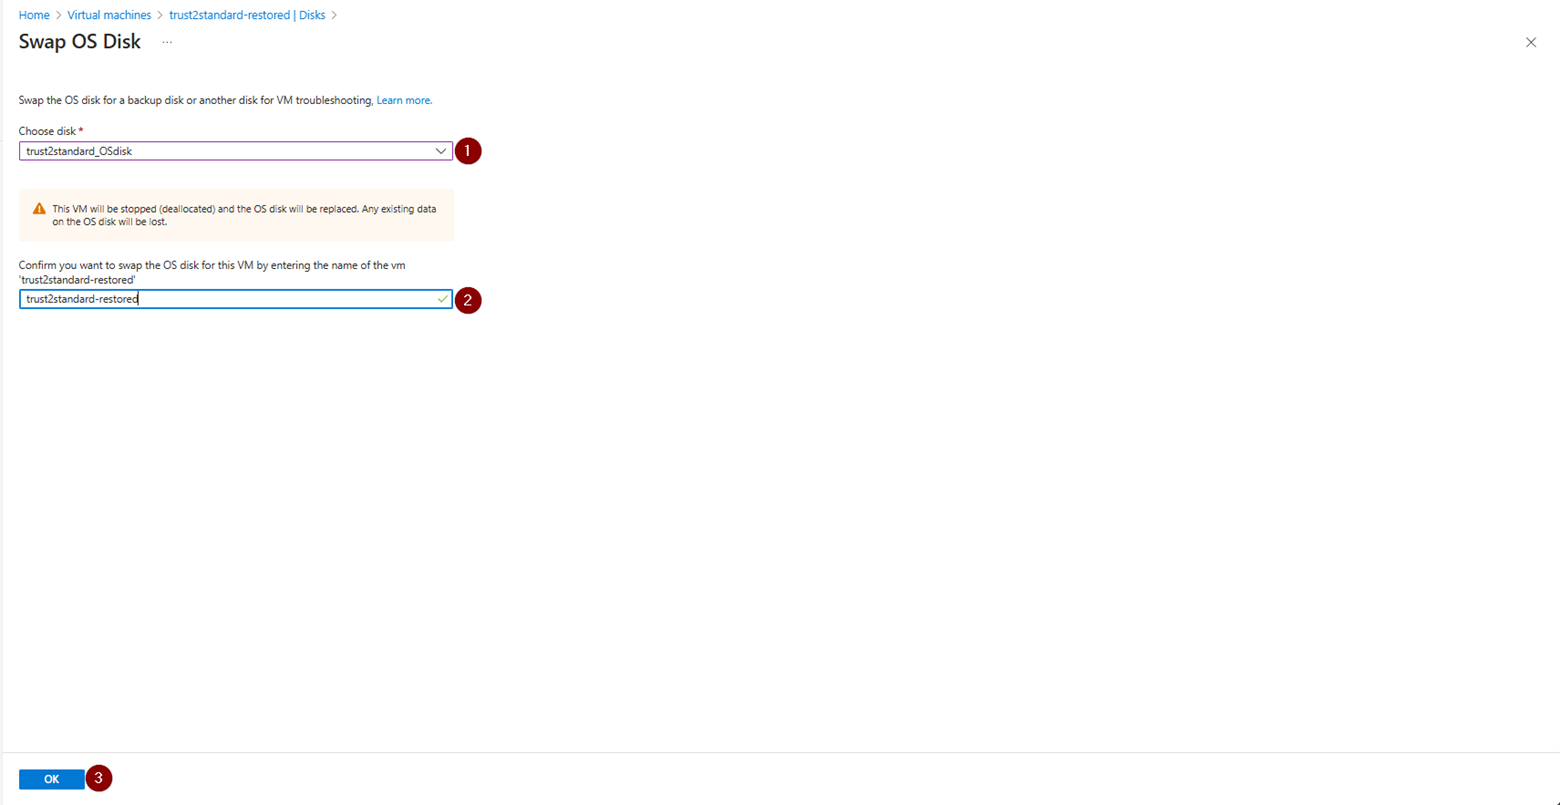
12. Swap the OS disk
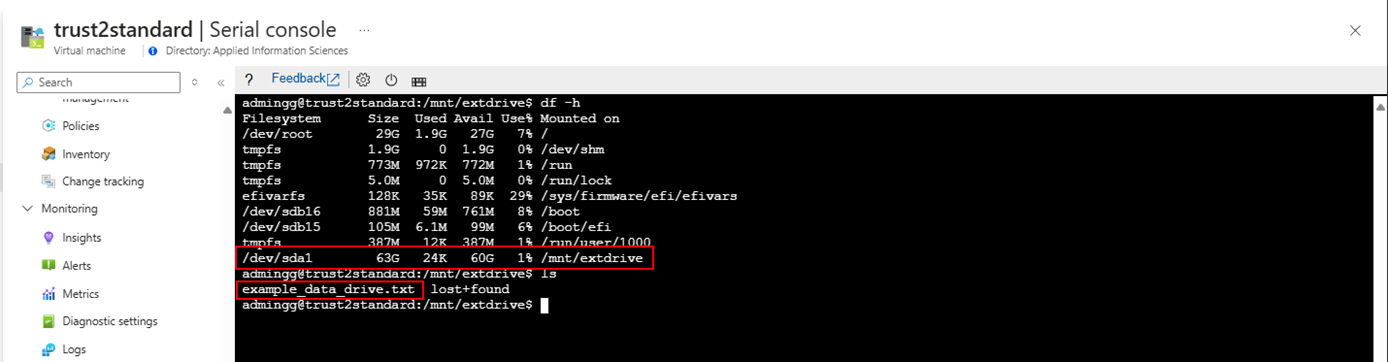
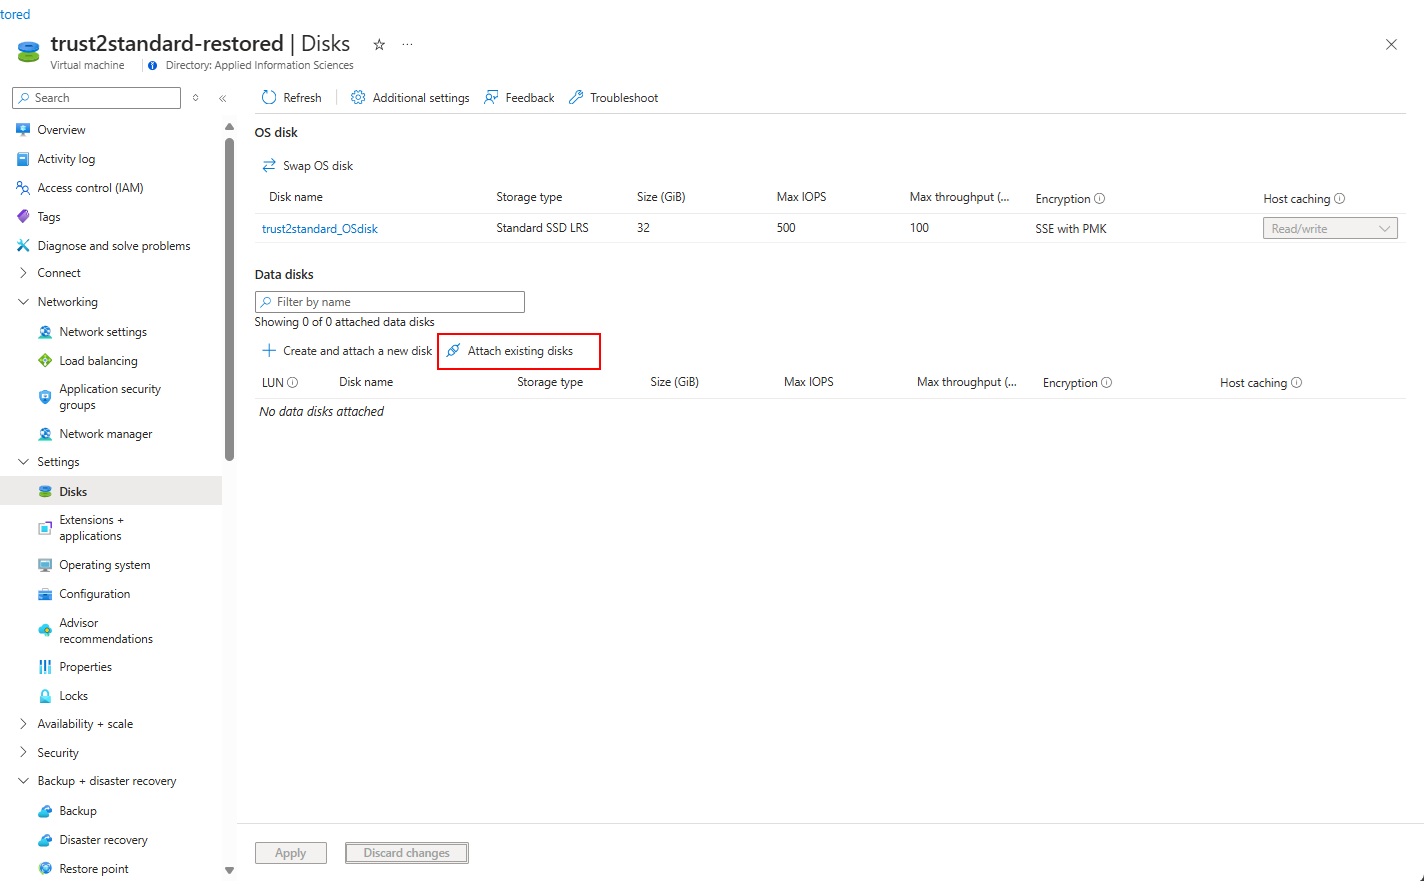
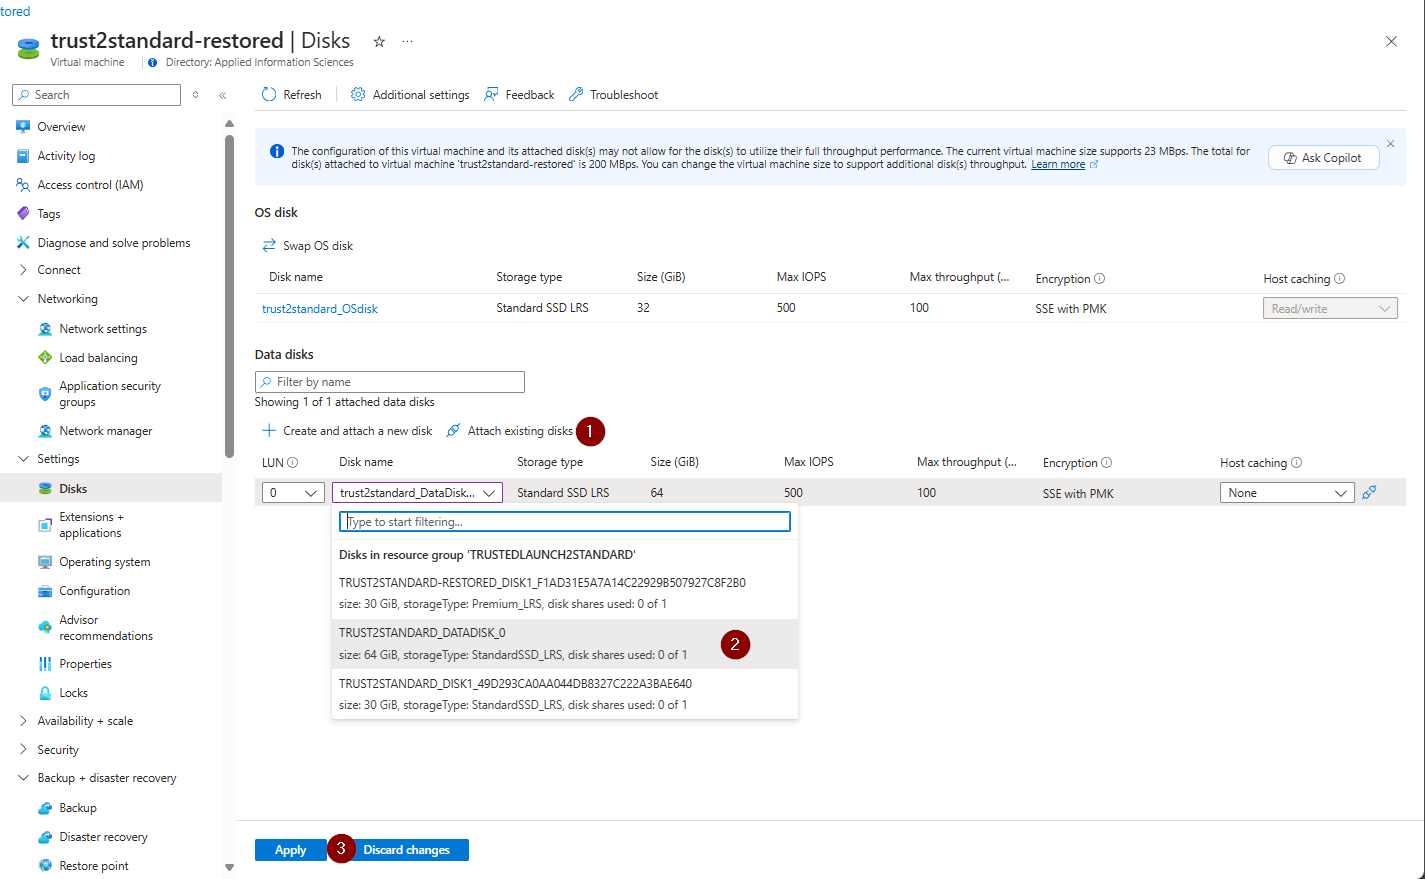
13. Add data disk(s)
14. Add users, groups, and managed identities back to groups, Azure RBAC Roles\
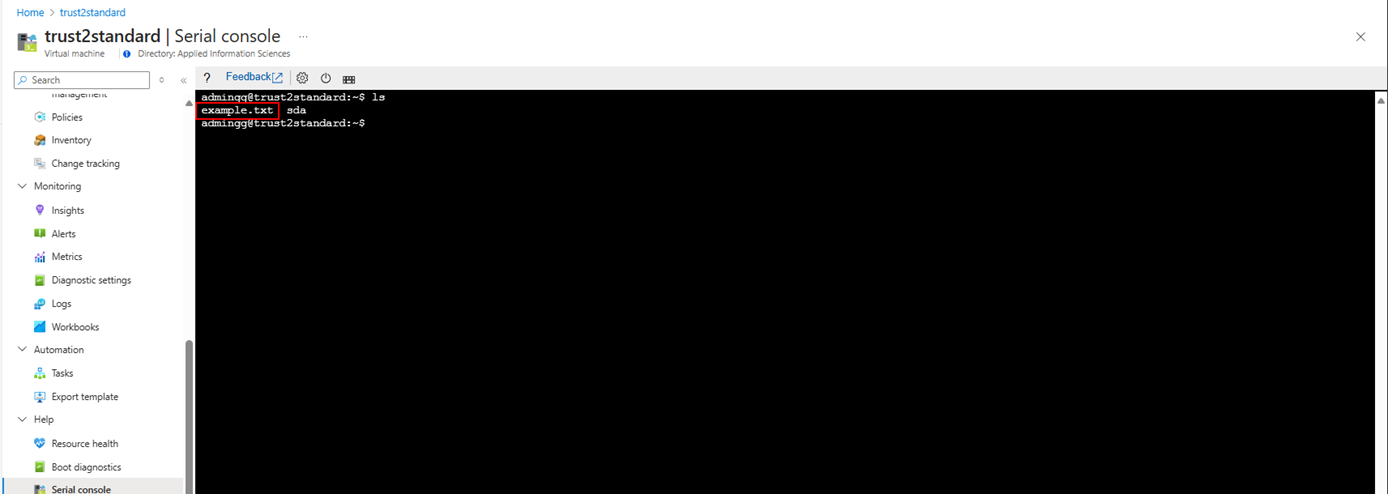
15. Start the VM
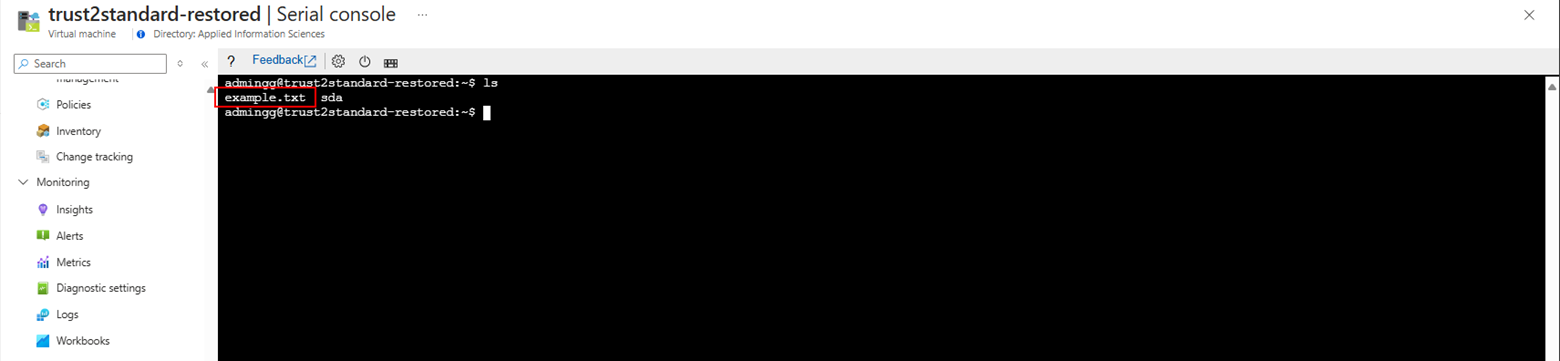
16. Perform any required testing
17. Remove old backup – if using Azure backup
18. Create new backup for the VM
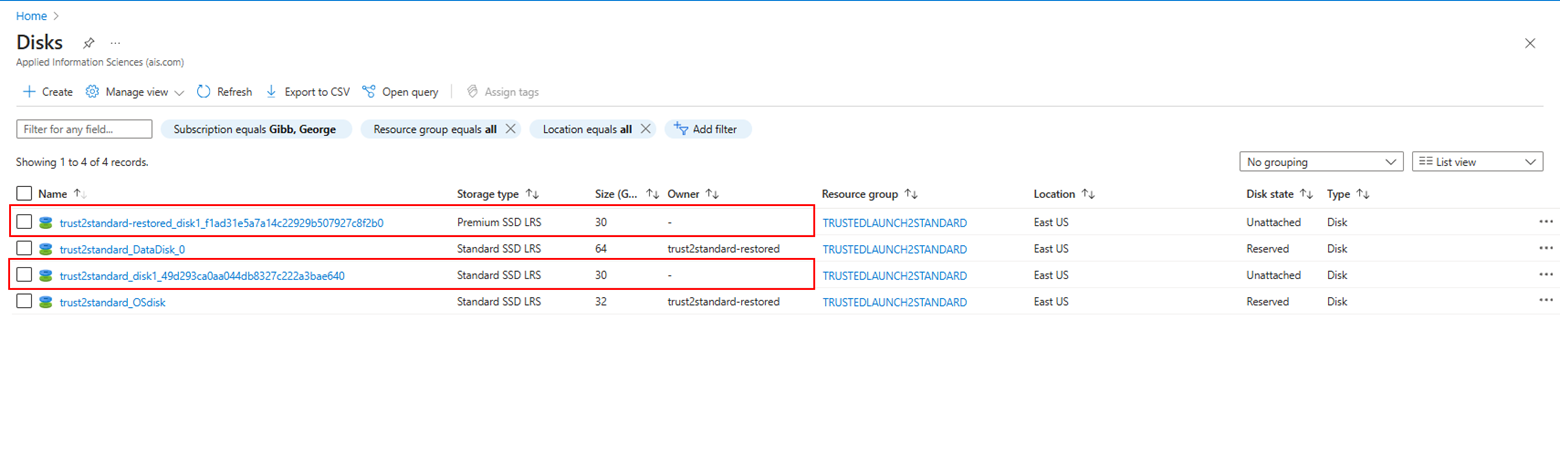
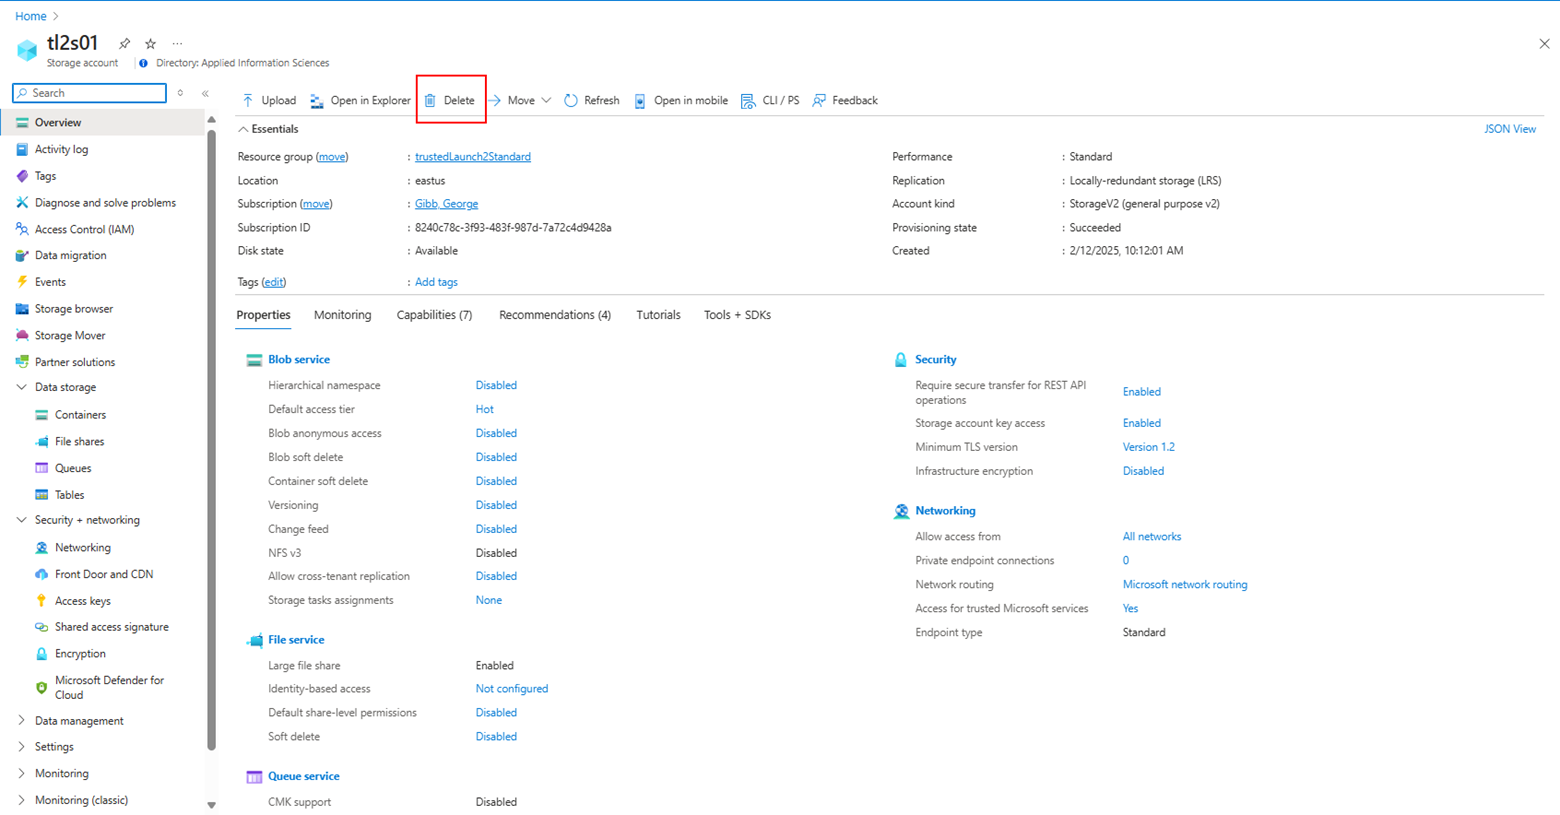
19. Delete the disks that are no longer needed, this would be the OS disk that was created with the new VM configured as Standard and the OS disk that was part of the original VM.
20. Delete the NIC that was created with the new VM configured as Standard

Conclusion
Converting an Azure Virtual Machine (VM) from Trusted Launch Security to Standard doesn’t have to be a cumbersome and time-consuming ordeal. When it’s complete, you’ll have a VM that is configured with the Standard security type. By following the method outlined in this blog post, you can retain all your VM’s OS and data configurations, thereby ensuring a smoother and more efficient migration process. This approach not only saves you valuable time but also minimizes the risk of data loss and configuration errors. Whether you are dealing with the limitations of Trusted Launch on Linux or simply looking for a streamlined VM security type conversion process, this method provides a reliable solution to meet your needs.
If you found this guide helpful, be sure to share it with your team and colleagues. Have questions or need further assistance? Drop a comment below or reach out (sales@ais.com), we’d love to help! Happy migrating!