 Our Windows Azure Media Services Manager (WAMS Manager) is a desktop-based application that makes it easy to upload, tag, encode and publish your media assets. It is designed to bring the benefits of Windows Azure Media Services to end users (typically business users responsible for managing media files) without the need to write any code.
(If you would rather skip the background and a high-level description of the overall architecture and simply get access to an evaluation copy of this tool, please email us directly.)
For everyone else, we are glad that you are taking the time to read this. Let’s start with some quick background…
Background
Windows Azure Media Services (WAMS) is part of the Windows Azure Platform and offers the flexibility, scalability and reliability of a cloud platform to create a custom media workflows for creation, management and distribution of media. It enables developers to build solutions for ingesting, processing, managing and delivering media content. Media Services is built on the infrastructure of Windows Azure (to provide media processing and asset storage) and IIS Media Services (to provide content delivery).
So…Why Do I Need a Desktop Tool to Manage My WAMS Assets?
Four reasons:
- While WAMS offers a rich set of highly scalable media-related capabilities, it is important to note that it is designed to be a platform and not an end-user accessible application. WAMS features a REST-based API that can be used by partners and ISVs to leverage WAMS capabilities. End users, however, are probably not familiar with WAMS concepts like Asset, AssetFile, AccessPolicy, Job, etc. WAMS Manager replaces these concepts with simple monikers that are easily understood by end users. Using easily understood terms, the end user can simply create a container and upload video files into the container.
- Windows Azure Media Services API is not designed to be a high throughput API for querying media assets. As such, it cannot serve as a repository for storing metadata associated with the media assets — this is why our WAMS Manager application uses Windows Azure Storage Table as a custom metadata repository. This design allows us to not only support highly efficient create, update and query operations but also store custom metadata such as information related to tagging and categorization of media assets. WAMS Manager also allows searching for media assets based on keywords.
- Rather than working with the ever-evolving and tedious encoding formats, WAMS Manager allows the end user to select from a list of friendly encoding options defined by using a separate administration interface. The administration interface is a self-standing Azure website that allows an IT administrator to configure user-friendly encoding options and setup WAMS management keys. This split design (desktop application and administration website) allows us insulate the end users from the underlying technical details of WAMS. Perhaps, even more importantly, this design removes the need for the end users to handle the WAMS account keys. Instead, administrators can provision users.
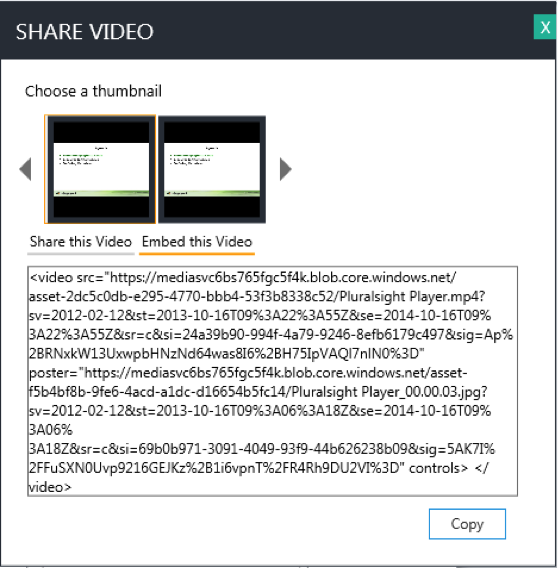
- WAMS Manager makes it easy to generate HTML code snippets for embedding WAMS assets into websites, blogs and wikis.
High-Level Architecture
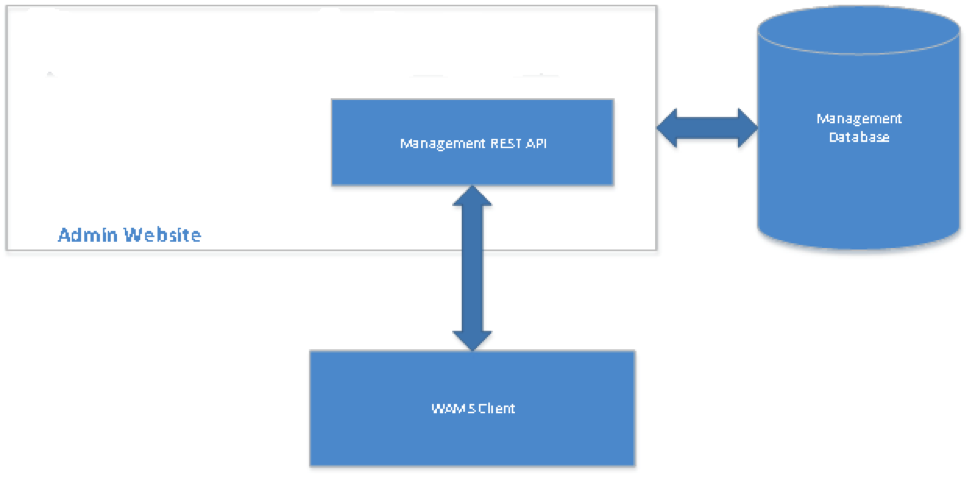
The following diagram depicts the high-level architecture of the WAMS Manager.
Admin Website
The admin website allows administrators to define system-wide settings, including setting up users and granting them access to media services projects, and defining a list of encoding types.
Admin website is an ASP.Net MVC application built on Windows Azure Websites.
Note: We create an Azure Website instance for each tenant. You log on to the tenant that was provisioned for you and provide your WAMS credentials. This way your media assets are securely stored within your subscription. The admin website is only providing the metadata store and a REST endpoint for the management API.
Management REST API
This is the API layer that facilitates communication between our WAMS Manager application and Windows Azure Media Services. The API layer is also responsible for acting as a bridge between the WAMS Manager and the management database.
This API will expose functionality desired by the client application to manage media assets. For example, this API will have functions to create assets, submit encoding jobs, etc.
Management Database
The management database is the metadata store. It uses Windows Azure Table Storage for storing the metadata about the assets, including:
- List of media services projects
- List of assets along with the thumbnails
- Supported encoding types
- Asset metadata like tags and categories
- Status of various encoding jobs submitted through the system
Client
This is the desktop application that is used by the end users to manage media assets. For most operations, the WAMS client will communicate with Management REST API. The one exception would be uploading media files to Windows Azure Storage, which would be accomplished by directly uploading the file from local computer to storage using a shared access signature.
Getting Started With WAMS Manager
Configuring the WAMS Manager Website
To install the WAMS Manager, an IT Administrator needs to download the setup from a web portal.
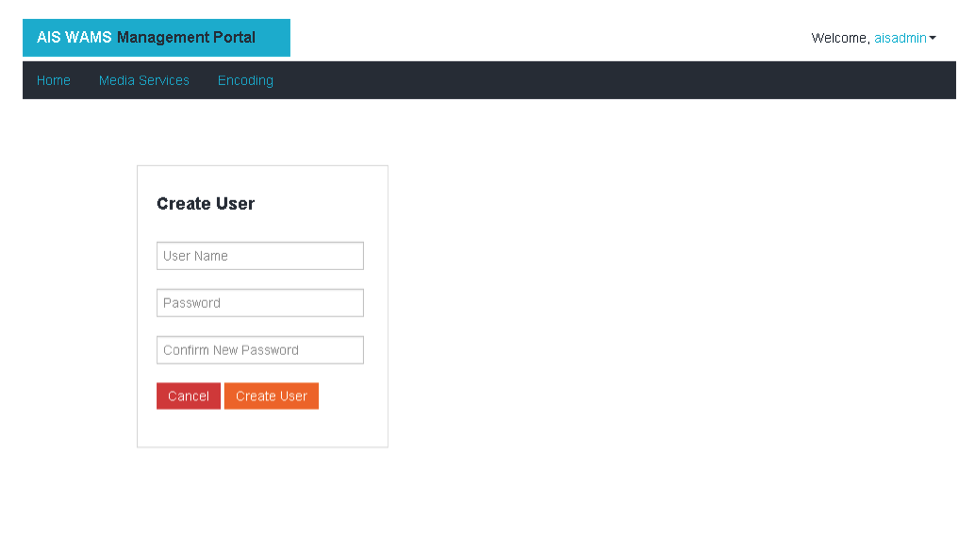
An IT Administrator can create and manage users for the desktop application from the portal itself. As depicted in the screenshot below, an Admin can create a new user by providing a new user name and assigning a password to it.
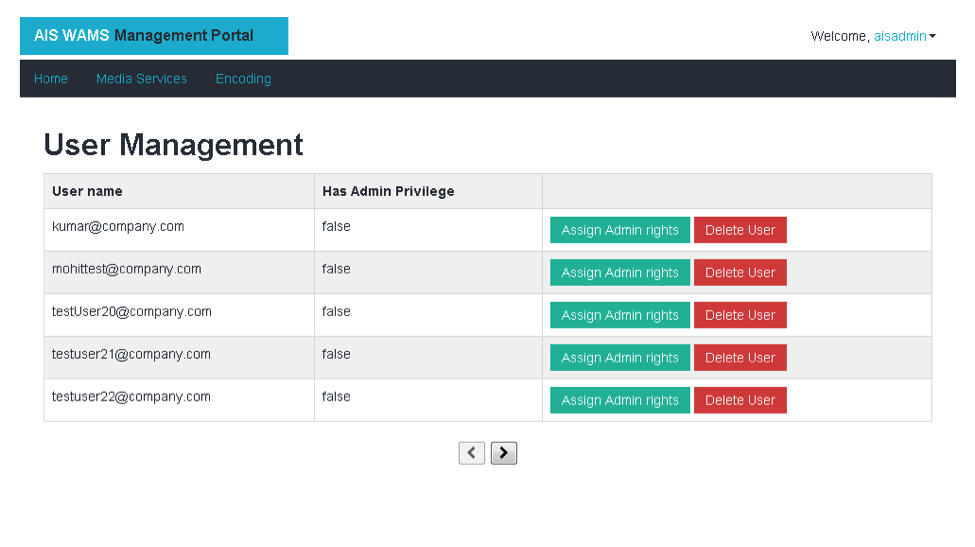
Here, an Admin can manage all the users. (The Admin can also assign a user admin rights or delete the user as per the requirements).
Adding New Encoding Type
Encoding is the process of taking a video and compressing it into a format that can be consumed by your customers. These encoding types will be available to your users and they will be able to encode videos in one or more formats through the desktop application.
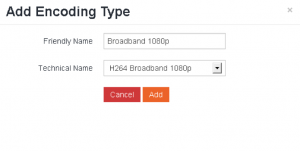
To add an encoding type, select “Technical Name” from the dropdown and “Friendly Name” for user understanding.
Adding WAMS Services
Here is the process to register media services with the WAMS Manager administration site:
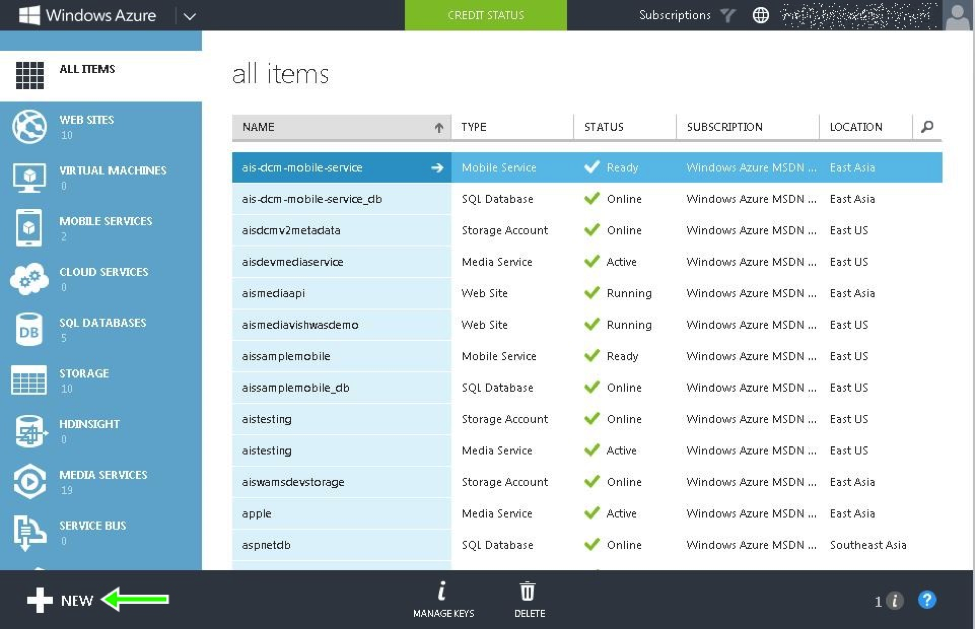
Step 1: Go to manage.windowsazure.com and click on ‘NEW’ button (at the bottom).
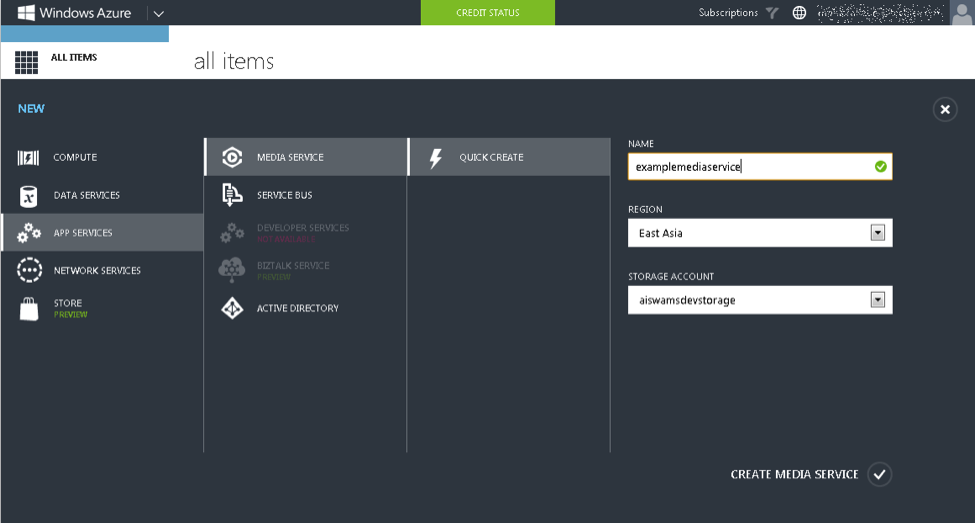
Step 2: To create Media Services, click on ‘App Services’ then select ‘Media Service’ and click on ‘Quick Create.’ Enter the following fields:
- Media service name
- Select the region where you want to host your service
- Select your storage account
Click on the Create Media Service button to create your media service.
Admin will see this dialog before a media service is created:
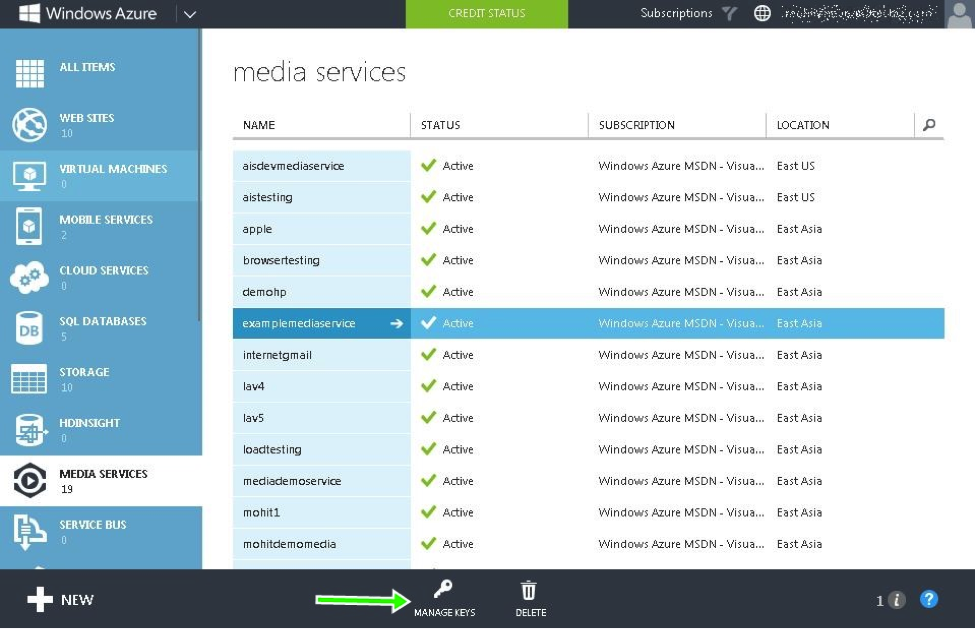
Step 3: Click on ‘Media Services.’ Select your media service and click on ‘Manage Keys.’
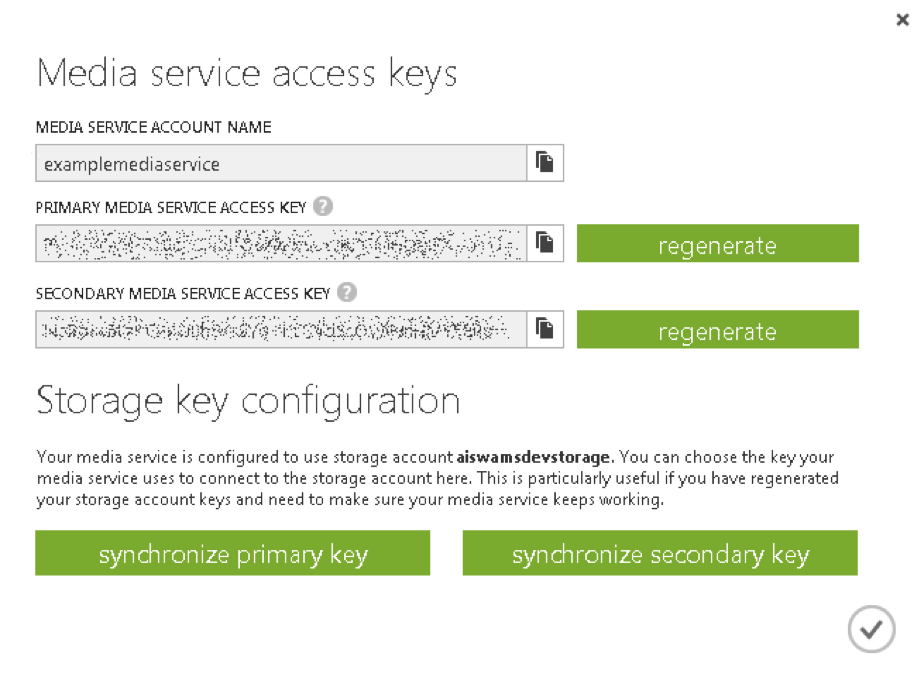
Step 4: A popup will display media service information. Make a note of the following information:
- Media Service Account Name
- Primary Media Service Access key
- Secondary Media Service Access Key
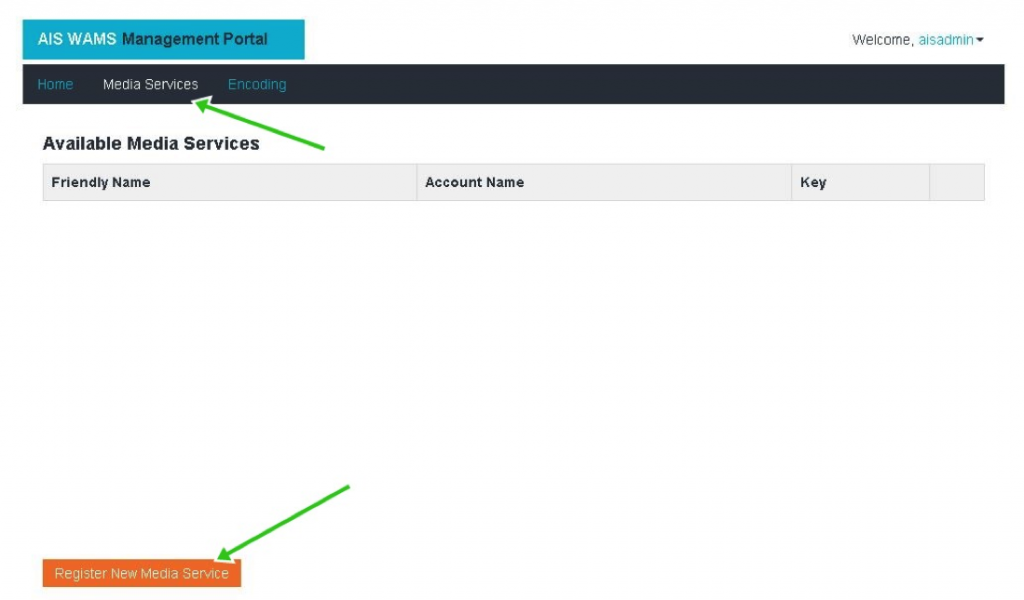
Step 5: Go to your WAMS Site and click on ‘Media Services.’ Click on ‘Register New Media Service.’ Media Service will act as the collection of different albums that comprise multiple videos.
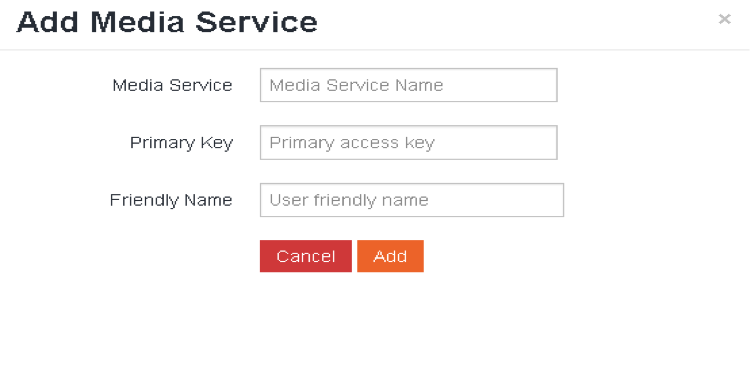
Step 6: A popup will appear where the fields from Azure Management Portal need to be replicated. Click on ‘Add’ to add your media services.
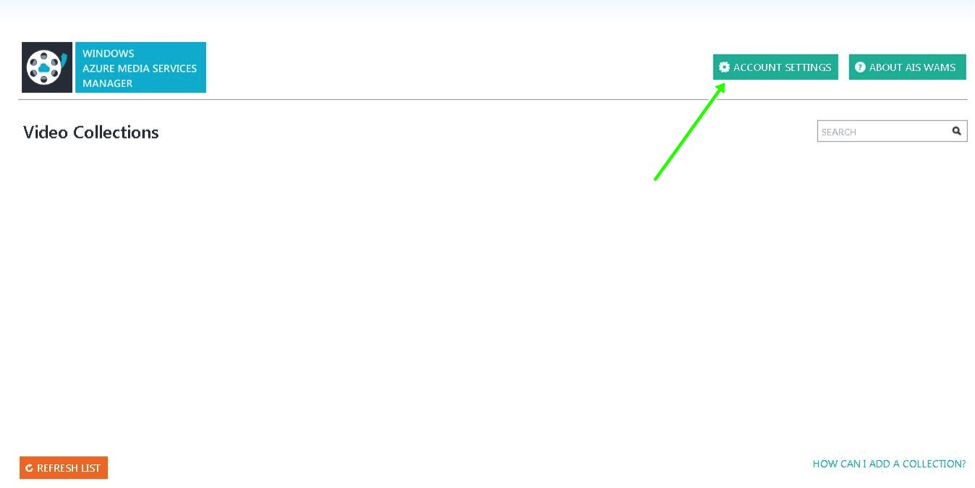
After installation of the app, at first launch, user will see this homepage (given below in the screenshot). To set up an account, follow these steps:
Step 1: Click on ‘Account Settings’ on the homepage.
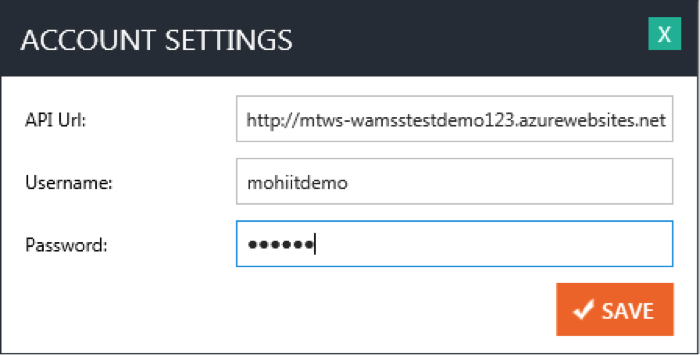
Step 2: A new pop-up will appear where the user needs to enter the API URL and account details given by Admin and then click ‘Save.’ This will load the configured settings for your account and you will be able to see all media services under the name.
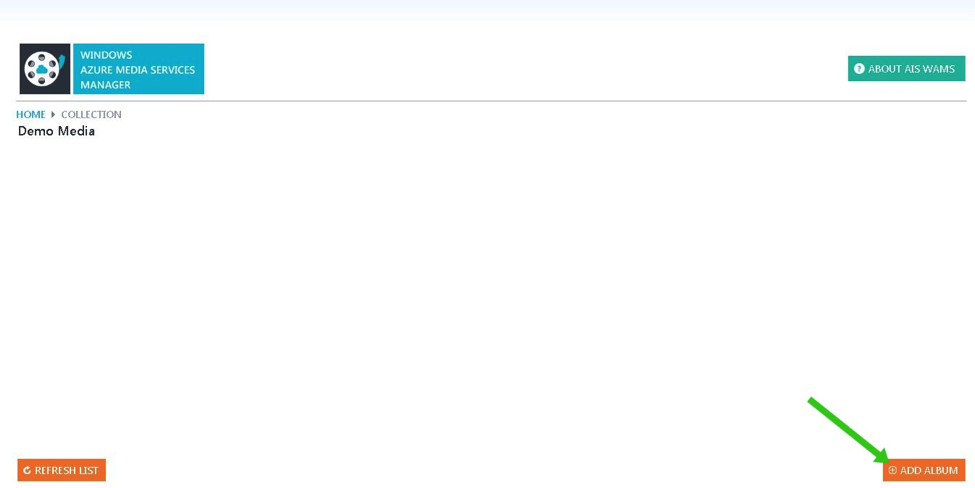
Step 3: Now click on the collection and add a new album as shown below. Enter a new album name.
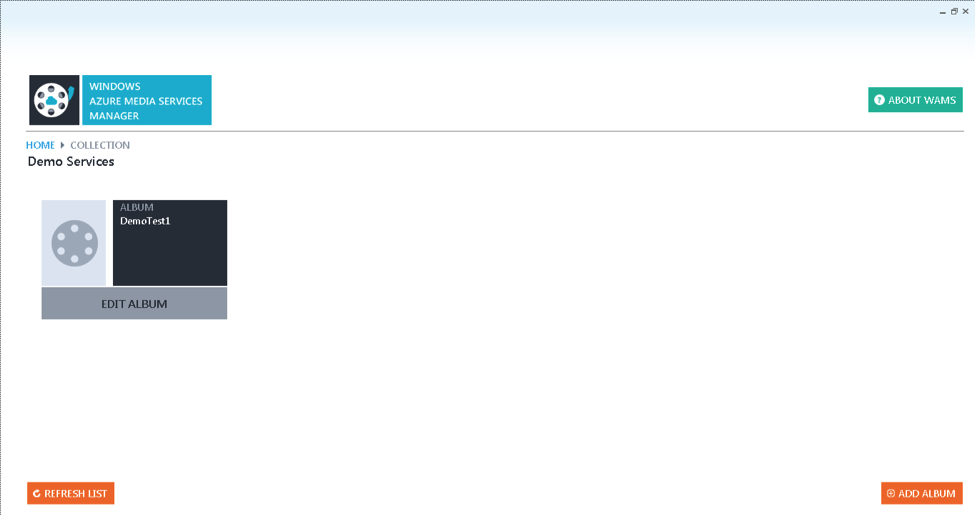
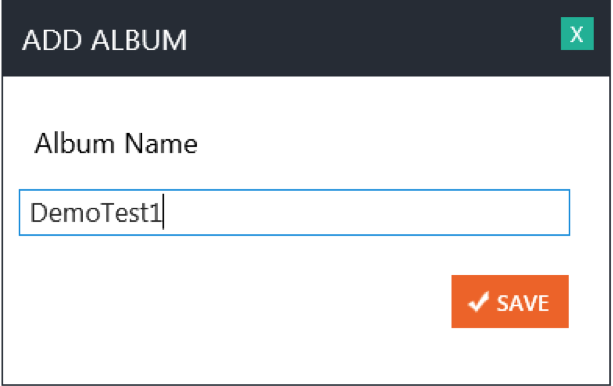 Step 4: The new album has been created. Users can create albums under this collection.
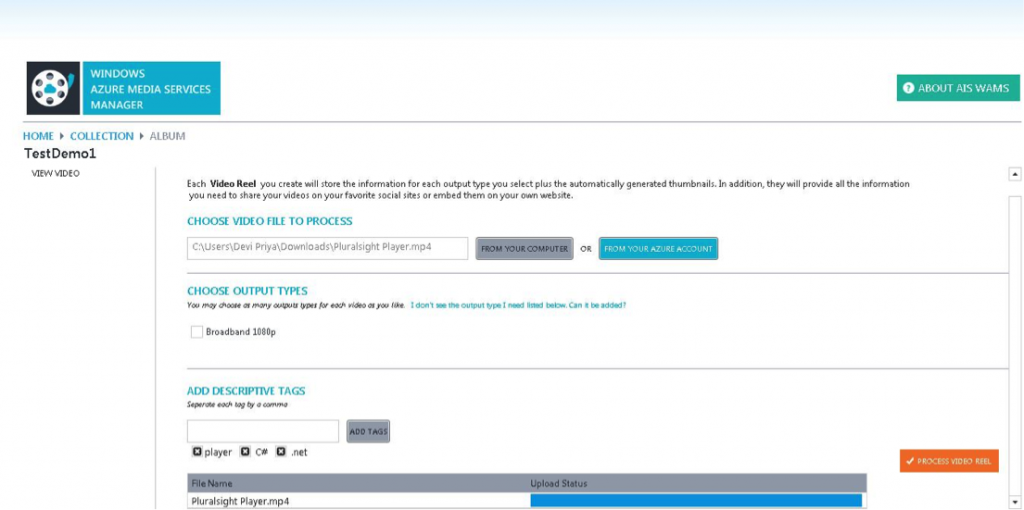
Step 5: Click on ‘Edit Album’ to add or view the videos in that album. Here the user can upload videos from their local computer or from an Azure account. As per the configuration settings by Admin on the web portal, the users will be able to see the list of encoding types and they can encode a video in multiple formats simultaneously.
Step 6: Browse to the file and choose an Output Type. Add tags that user can search for. Click on ‘Process Video Reel’ to upload and encode the video.
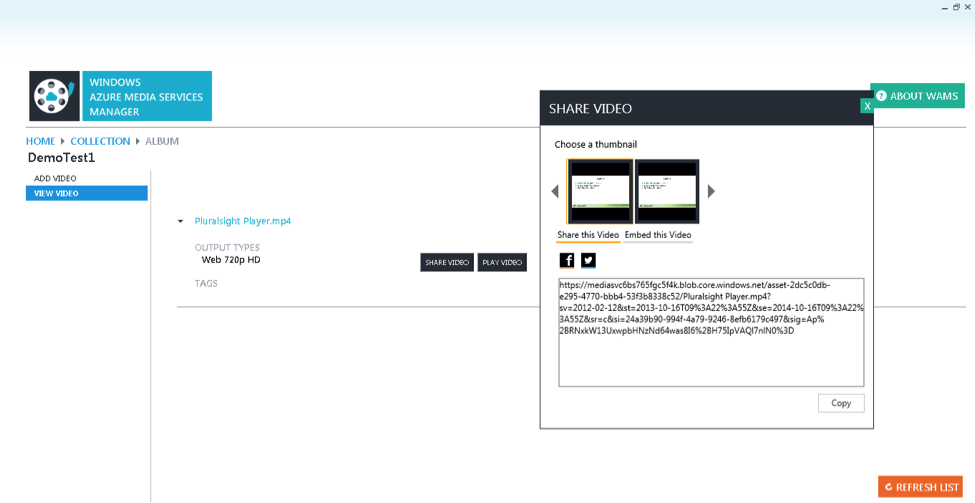
Step 7: After the video is fully uploaded, the user can view this video and others by clicking on the ‘View Videos’ tab.
Step 8: Click on the video to play or share it. The user can share the video directly via Facebook and Twitter. The user can also copy the URL to share according to specific requirements, or embed the video by copying the embedded URL for an external site.


