 Today, let’s talk about network isolation and traffic policy within the context of Kubernetes.
Network Policy Specification
Kubernetes’ first-class notion of networking policy allows a customer to determine which pods are allowed to talk to other pods. While these policies are part of Kubernetes’ specification, tools like Calico and Cilium implement these network policies.
Here is a simple example of a network policy:
...
  ingress:
  - from:
    - podSelector:
        matchLabels:
          zone: trusted
  ...
In the above example, only pods with the label zone: trusted are allowed to make an incoming visit to the pod.
egress:
  - action: deny
    destination:
      notSelector: ns == 'gateway’
The above example deals with outgoing traffic. This network policy will ensure that traffic going out is blocked unless the destination is a node with the label ‘gateway’.
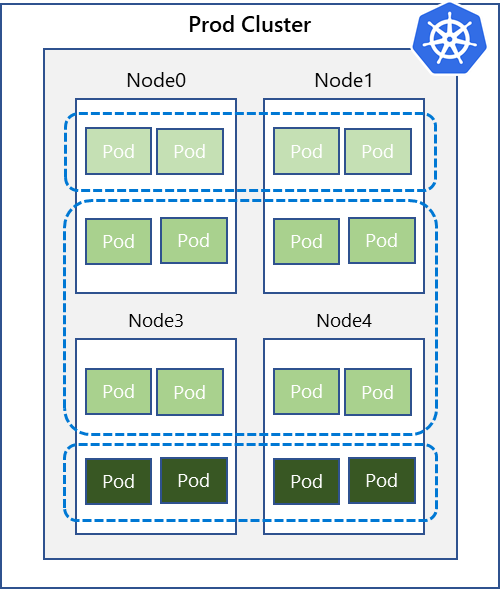
As you can see, network policies are important for isolating pods from each other in order to avoid leaking information between applications. However, if you are dealing with data that requires higher trust levels, you may want to consider isolating the applications at the cluster level. The following diagrams depict both logical (network policy based) and physical (isolated) clusters.

Network Policy is NOT Traffic Routing…Enter Istio!
Network policies, however, do not allow us to control the flow of traffic on a granular level. For example, let’s assume that we have three versions of a “reviews” service (a service that returns user reviews for a given product). If we want the ability to route the traffic to any of these three versions dynamically, we will need to rely on something else. In this case, let’s use the traffic routing provided by Istio.
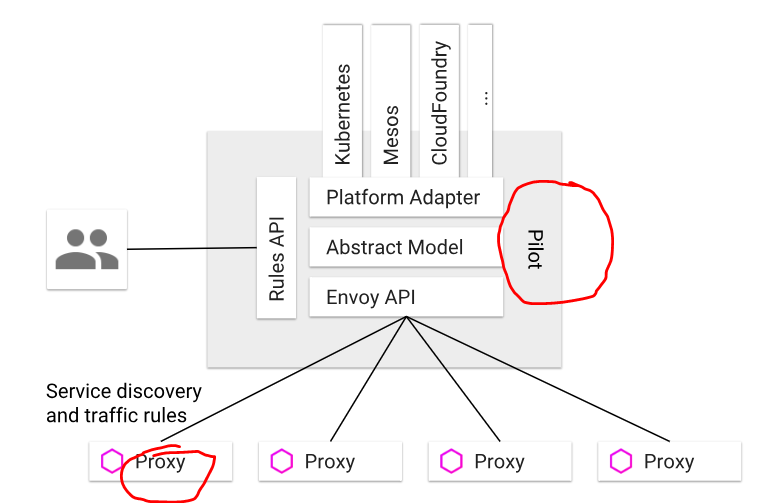
Istio is a tool that manages the traffic flow across services using two primary components:
- An Envoy proxy (more on Envoy later in the post) distributes traffic based on a set of rules.
- The Pilot manages and configures the traffic rules that let you specify how traffic should be routed.
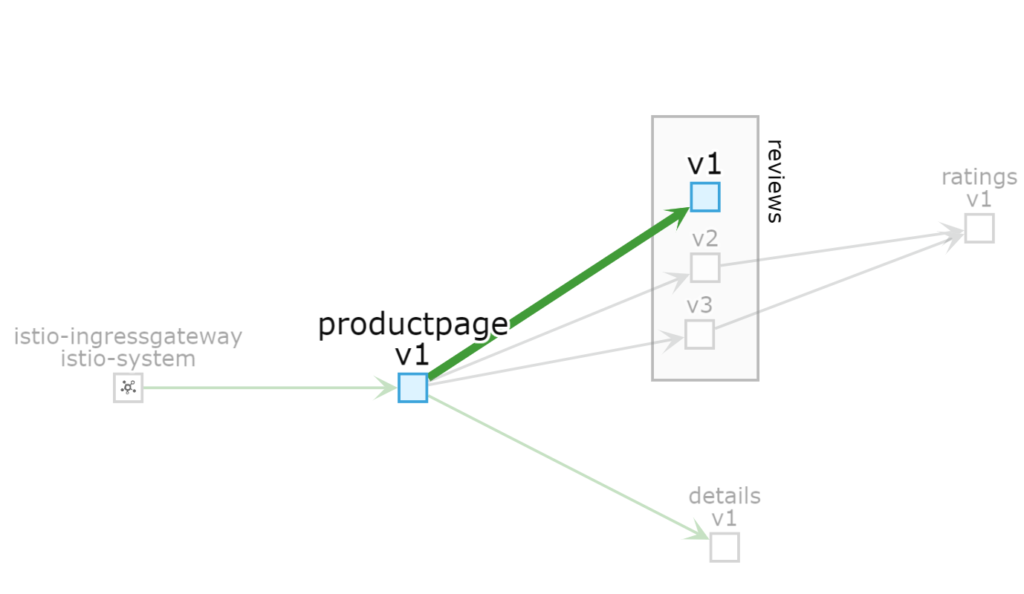
Here is an example of Istio policy that directs all traffic to the V1 version of the “reviews” service:
apiVersion: networking.istio.io/v1alpha3
kind: VirtualService
metadata:
  name: reviews
spec:
  hosts:
  - reviews
  http:
  - route:
    - destination:
        host: reviews
        subset: v1
Here is a Kiali Console view of all “live” traffic being sent to the V1 version of the “reviews” service:
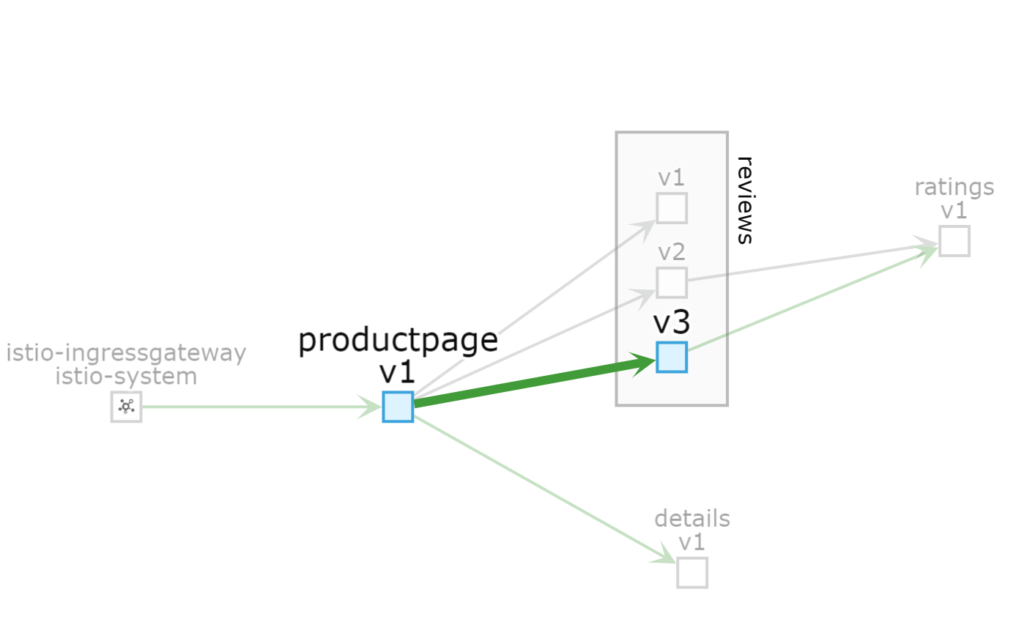
Now here’s an example of Istio policy that directs all traffic to the V3 version of the “reviews” service:
apiVersion: networking.istio.io/v1alpha3
kind: VirtualService
metadata:
  name: reviews
spec:
  hosts:
    - reviews
  http:
  - route:
    - destination:
        host: reviews
        subset: v3
And here is a Kiali Console view of all “live” traffic being sent to the V3 version of the “reviews” service:
Envoy Proxy
Envoy is a lightweight proxy with powerful routing constructs. In the example above, the Envoy proxy is placed as a “sidecar” to our services (product page and reviews) and allows it to handle outbound traffic. Envoy could dynamically route all outbound calls from a product page to the appropriate version of the “reviews” service.
We already know that Istio makes it simple for us to configure the traffic routing policies in one place (via the Pilot). But Istio also makes it simple to inject the Envoy proxy as a sidecar. The following Kubectl command labels the namespace for automatic sidecar injection:
#--> Enable Side Car Injection
kubectl label namespace bookinfo istio-injection=enabled
As you can see each pod has two containers ( service and the Envoy proxy):
# Get all pods
kubectl get pods --namespace=bookinfo
I hope this blog post helps you think about traffic routing between Kubernetes pods using Istio and Envoy. In future blog posts, we’ll explore the other facets of a “service mesh” – a common substrate for managing a large number of services, with traffic routing being just one facet of a service mesh.


